
Polygon and Avalanche are two of the leading and fastest-growing blockchains in the Decentralized Finance space. Both blockchains are aimed at providing scalable and efficient infrastructure to build, deploy and run a wide range of decentralized applications effortlessly.
Even though Polygon and Avalanche share many similarities including scalability, interoperability, proof of stake consensus mechanism, and focus on decentralized applications, many developers and users are still looking to explore features unique to each network.
The process of moving crypto assets from one blockchain to another is called bridging and many times, DeFi investors and developers often find themselves needing to move tokens and other crypto assets across blockchains.
Bridging crypto from Polygon to Avalanche can be a complex process for some, especially for newer investors in the DeFi space and this article is here to make it easier.
In this guide, you will learn how to bridge from Polygon to Avalanche easily using a recommended crypto bridge that supports both blockchains.
How To Bridge From Polygon To Avalanche (Step By Step Guide)
To bridge tokens and other crypto assets from the Polygon blockchain to Avalanche, you need to use a cross-chain crypto bridge that supports both the source and target blockchains.
Thankfully, due to rapid innovation in the DeFi space, there are a handful of crypto bridges that you can utilize to bridge your crypto assets across compatible blockchains effortlessly.
One such bridge is the Celer cBridge which supports most of the popular EVM-enabled blockchains including Polygon and Avalanche.
Below is a step-by-step guide showing how you can bridge from Polygon to Avalanche in a few easy steps.
For this tutorial, we will be showing you how to bridge USDC from Polygon to Avalanche but you can also bridge other supported tokens including USDT and WETH using this guide.
Step 1: Switch to the Polygon Mainnet on your wallet.
Before you can bridge assets from Polygon to Avalanche using any crypto bridge, you have to switch the default network on your wallet to the Polygon Mainnet.
To switch the default network on your Metamask wallet to the Polygon Mainnet, open the Metamask extension on your web browser and unlock your wallet using your Metamask password.
Next, click on the network selector box and select “Polygon Mainnet” from the list of available networks on the dropdown menu.
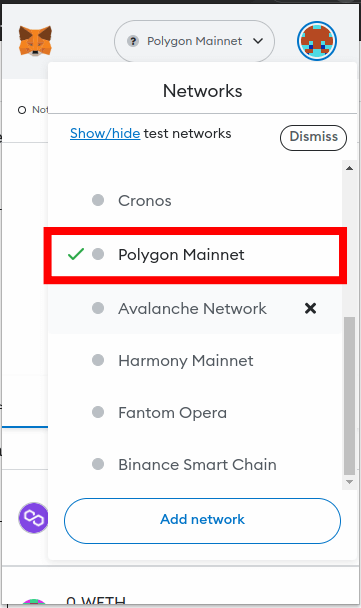
If you can’t find the Polygon Mainnet on the list of available networks in your wallet, then you will need to add the network to your wallet first before proceeding.
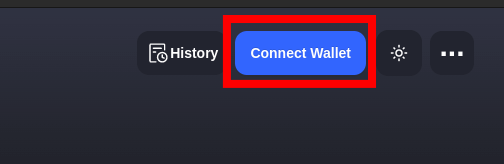
Step 2: Open the Celer cBridge website and connect your wallet to the platform.
Now open the Celer cBridge website [https://cbridge.celer.network/] on your web browser (with Metamask or any wallet of your choice installed), and click [Connect Wallet].
Next, select Metamask from the list of compatible wallets on the dialog then select the account(s) you want to connect to the cBridge on Metamask and approve the connection.
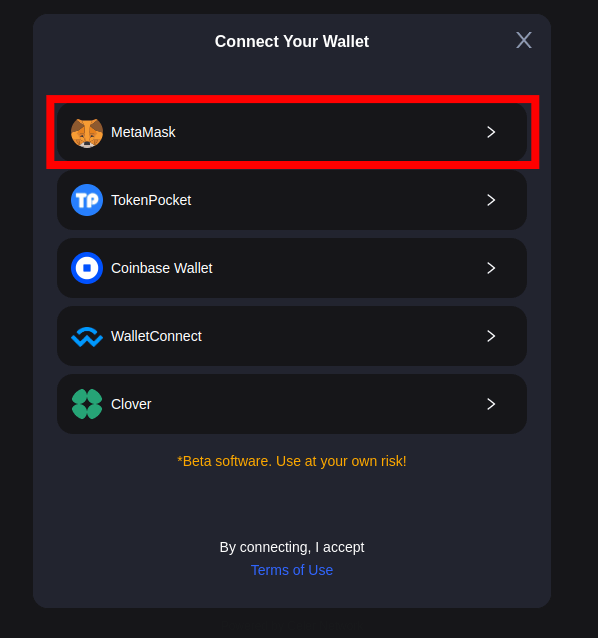
If you’re using another crypto wallet with native Polygon support (eg Coinbase Wallet) select the wallet from the list of compatible crypto wallets on the Celer Bridge platform then approve the connection.
Step 3: Select the source chain (Polygon) and destination chain (Avalanche).
After connecting your wallet to the bridge, select “Polygon” as the source chain in the “From” section and “Avalanche” as the destination chain in the “To” section.
Step 4: Select the token to bridge, enter an amount and click [Transfer].
Next, select the token you want to bridge, enter an amount and click [Transfer] to start the bridging process.
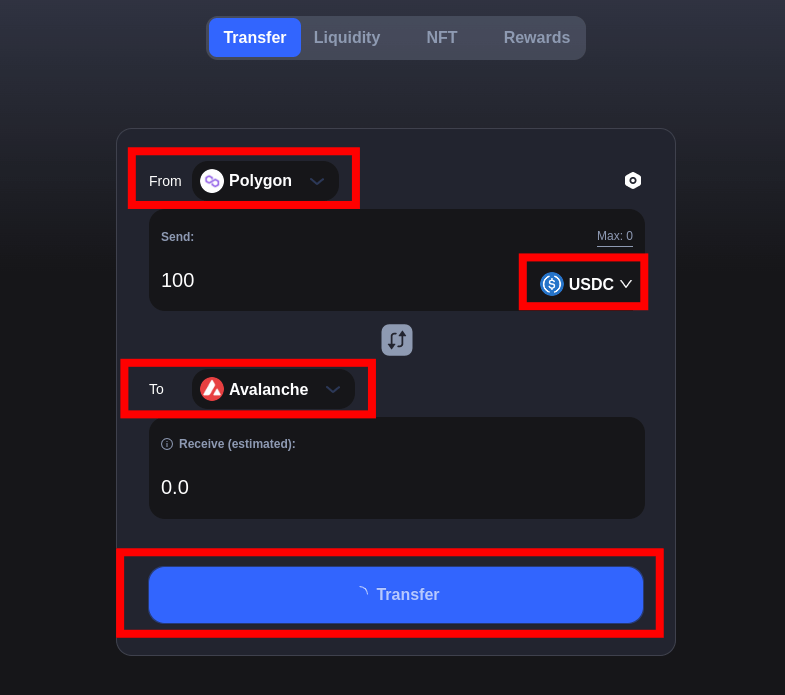
For this article, we will be showing you how to bridge USDC from Polygon to Avalanche so we will be selecting “USDC.e” as the token to be bridged. That said, you can also bridge other tokens including USDT and WETH from Polygon to Avalanche using this bridge.

Step 5: Approve token spend on Metamask and confirm the transaction.
After clicking Transfer, you should see a popup on cBridge asking for token spend approval. Click [Approve] on the dialog on the cBridge website, then click [Confirm] on Metamask to grant cBridge the approval to spend tokens on your Metamask wallet.
After granting token spend approval on Metamask, you should be prompted to confirm the transaction on cBridge. Review the transaction details including the transaction fees, estimated time of arrival, etc then click [Confirm Transfer].
Now, you should see a Metamask popup window showing the details of the transaction. Click [Confirm] on the Metamask window to approve the transaction on your wallet.
Once the transaction is approved on your Metamask wallet, go to cBridge and wait for the transaction to complete. When the transaction is complete, re-open Metamask and switch back to the Avalanche Mainnet to check if the funds you bridged are now available in your wallet.
And that’s how you can bridge crypto from Polygon to the Avalanche C-Chain. cBridge supports bridging a handful of tokens including USDC, USDT, WETH, and more from Polygon to Avalanche while charging some of the lowest base and liquidity fees when compared to other cross-chain bridges on the market.
How To Convert Polygon (MATIC) To AVAX?
To convert MATIC directly to AVAX, you will need to use any of the popular centralized crypto exchanges which support both cryptocurrencies on their respective native blockchains.
We generally recommend using Binance for converting crypto when it comes to centralized exchanges but as we mentioned earlier, any crypto exchange which supports MATIC and AVAX on their native blockchains will work just fine.
To convert MATIC to AVAX using Binance, go to the Binance website (or mobile app) and login into your account. If you don’t have a Binance account, you can create one using this link.
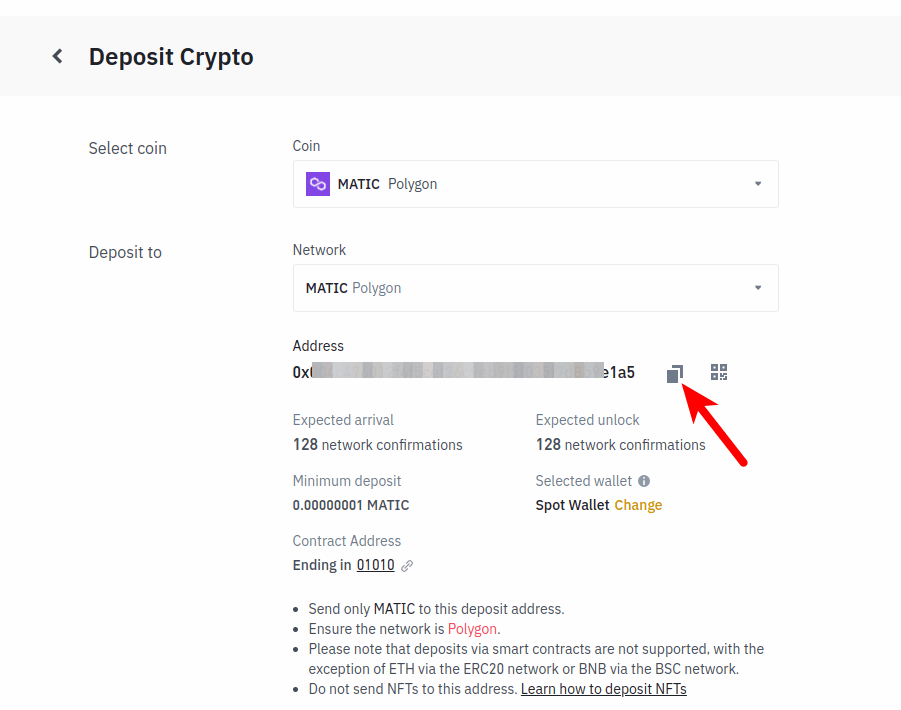
Now you will need to transfer some MATIC tokens to your Binance account which will later be converted to AVAX. On the Binance dashboard, click [Deposit].
Next, select “MATIC” as the coin to be deposited and choose “MATIC Polygon” as the network to be used for the deposit then click the Copy Icon to copy your Binance MATIC wallet address.
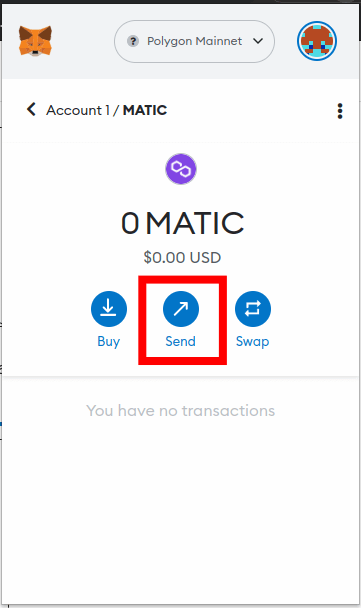
Once you have copied your Binance MATIC deposit/wallet address, head over to Metamask and unlock your wallet then switch to the Polygon mainnet on your wallet.
After switching networks on Metamask to the Polygon mainnet, select your MATIC balance then click [Send] on the next page.
Paste the MATIC wallet address you copied earlier from Binance and enter the amount of MATIC you intend to convert to AVAX, then hit [Next]. Review the transaction details and click [Confirm] to approve the transfer.
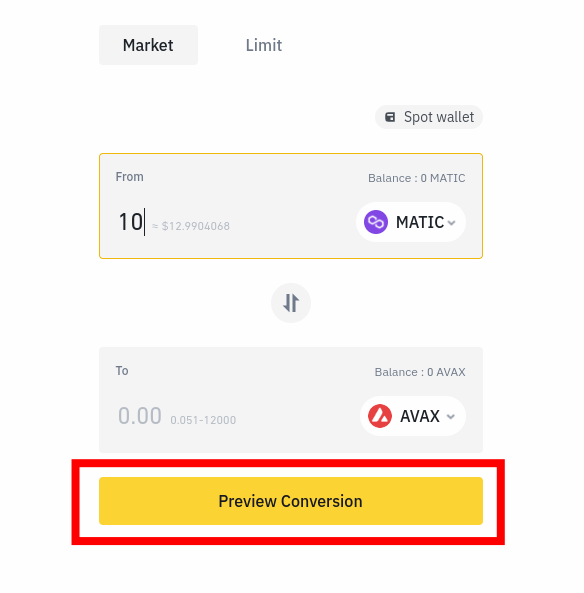
When the funds arrive on your Binance account, open the Binance Convert page, select “MATIC” as the coin to be converted in the From section, and “AVAX” as the coin to be received after conversion in the To section.
Next, enter the amount of MATIC you want to convert and click [Preview Conversion]. After that wait a few seconds to get a price quote then click [Convert] to swap your MATIC for AVAX.
After this, the equivalent amount of AVAX should be available on your Binance account and you will need to transfer AVAX back to your Metamask wallet since the conversion is complete.
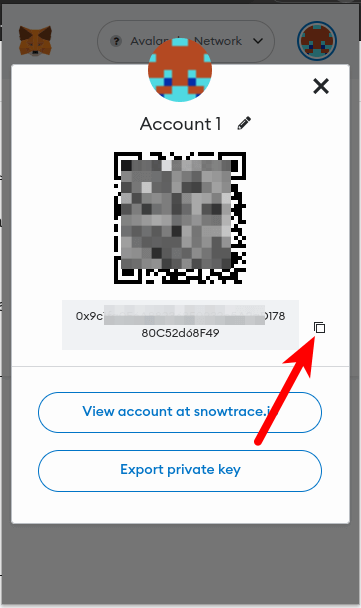
To transfer AVAX from Binance to your Metamask wallet, go back to Metamask and switch to the Avalanche Mainnet then copy your Metamask AVAX wallet address.
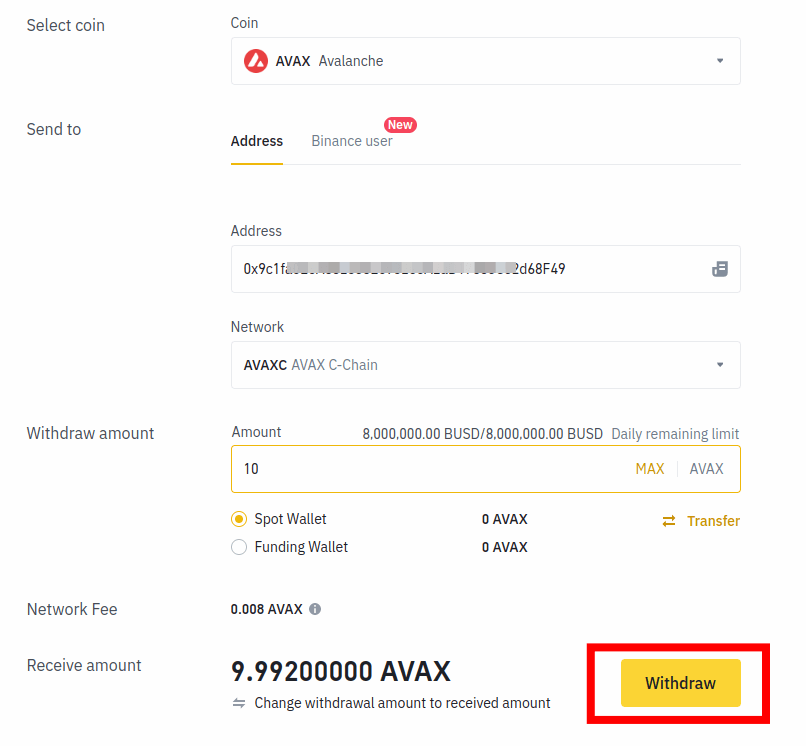
Now, go back to the Binance dashboard and click [Withdraw]. Select “AVAX” as the coin to withdraw, paste your Metamask AVAX wallet address in the “Address” section and select “AVAXC AVAX C-Chain” as the withdrawal network.
Finally, enter the amount of AVAX you want to transfer to your Metamask wallet and click [Withdraw]. Complete the 2-step verification and click [Submit] to approve the transaction.
The transaction should take anywhere from a few seconds to 3mins to complete. Once the transaction is complete, check your Metamask wallet (on the Avalanche network) and the funds you transferred should be available in your wallet.
And that’s how you can convert MATIC to AVAX using Binance. Currently, there are no cross-chain crypto bridges that support direct conversion from native MATIC to AVAX that’s why we recommend using a centralized exchange like Binance for this task.
That said, you can also use any crypto exchange of your choice which supports MATIC deposits and AVAX withdrawals if Binance is not available in your country or you prefer other exchanges.
Is Bridging Crypto From Polygon To Avalanche Safe?
Yes, bridging crypto from Polygon to Avalanche is generally a safe procedure but this depends on the cross-chain crypto bridge used.
Popular bridges including the Celer cBridge, Synapse, Anybridge, and more which support bridging across EVM-enabled chains are safe to use and pose extremely low risks when bridging crypto on their platforms.
Wrapping Up
Polygon and Avalanche are two popular blockchains in the Decentralized Finance space. Both blockchains offer support for smart contracts, lending, staking, and more.
Even though these blockchains share many similarities, there are still some features unique to each blockchain and many DeFi users and developers often find themselves needing to move assets from one blockchain to the other.
To move your crypto assets from Polygon to Avalanche, you need to use a cross-chain bridge that supports bridging across both blockchains.
We recommend using the Celer cBridge when bridging from Polygon to Avalanche. On cBridge, you can bridge a handful of tokens including popular ones like USDC, USDT, and WETH from Polygon to Avalanche easily.
