
The Polygon network (formerly known as the MATIC network) is one of the leading layer-2 decentralized scaling solutions for the Ethereum blockchain.
Polygon (MATIC) enables developers to build scalable user-friendly dApps with low transaction fees without sacrificing speed or security since the network inherits security from the Ethereum chain itself.
The Metamask wallet in contrast is the most popular open-sourced non-custodial wallet in the crypto space. It is used by millions of crypto investors across multiple operating systems to purchase, store, and trade cryptocurrencies and other digital assets with ease.
Since the Polygon Network is a sidechain for the Ethereum mainnet, it is compatible with the Ethereum Virtual Machine (EVM) i.e smart contracts are deployed directly on the Polygon chain. Being an EVM-compatible chain also means that it can be added to Metamask via RPC.
If you’re looking to add the Polygon network to your Metamask wallet, then you’re on the right article. In this guide, we will show you how to add the Polygon mainnet to Metamask easily in a few steps.
How To Add Polygon To Metamask (Quick Guide)
- Launch the Metamask extension/mobile app and unlock your account.
- Click on the network dropdown box.
- Select [Add Network].
- Enter the correct RPC details for the Polygon Network and click [Save].
- Transfer Polygon (MATIC) tokens to your Metamask wallet.
How To Add Polygon (MATIC) Network To Your Metamask Wallet (Guide With Pictures)
To add the Polygon network to your Metamask wallet, you first need to get the correct RPC endpoint details for the Polygon Mainnet (which will be included later in this article).
Once you have the custom RPC endpoint for the Polygon Mainnet, all you have to do is input each of them in the appropriate fields on the Metamask extension/mobile app then click on [Save] to add the network to your wallet.
Below is a step-by-step guide on how you can add the Polygon MATIC network to Metamask easily.
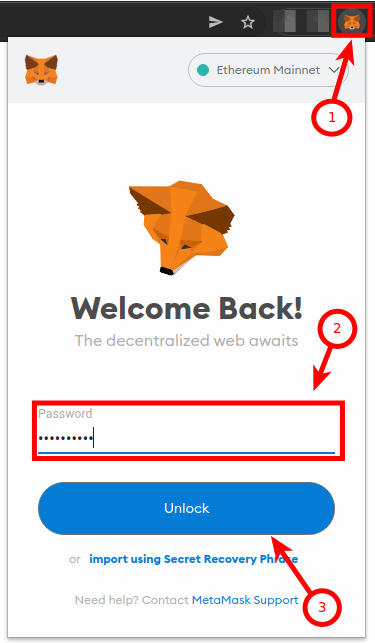
Step 1: Launch Metamask and input your account password to unlock the wallet.
If you haven’t installed the Metamask extension on your browser, you can get the correct version for your browser on the Metamask download page. If you have already installed the extension, you can skip this step since installing again will not be needed.
Once you have the extension installed and correctly set up, click on the Metamask icon in the extensions area of your web browser to launch the Metamask main window.
Enter your account password and click on [Unlock] to unlock your wallet.
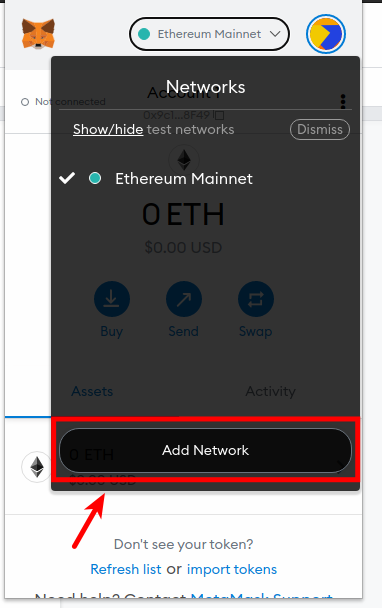
Step 2: Click on the network dropdown box.
On the Metamask main window, click on Network Dropdown Box to reveal a dialog with all available (configured) networks on your Metamask wallet.

Step 3: Now, click [Add Network] on the dialog.
Now, click [Add Network] on the dialog to add a new network (Polygon) to your Metamask wallet.
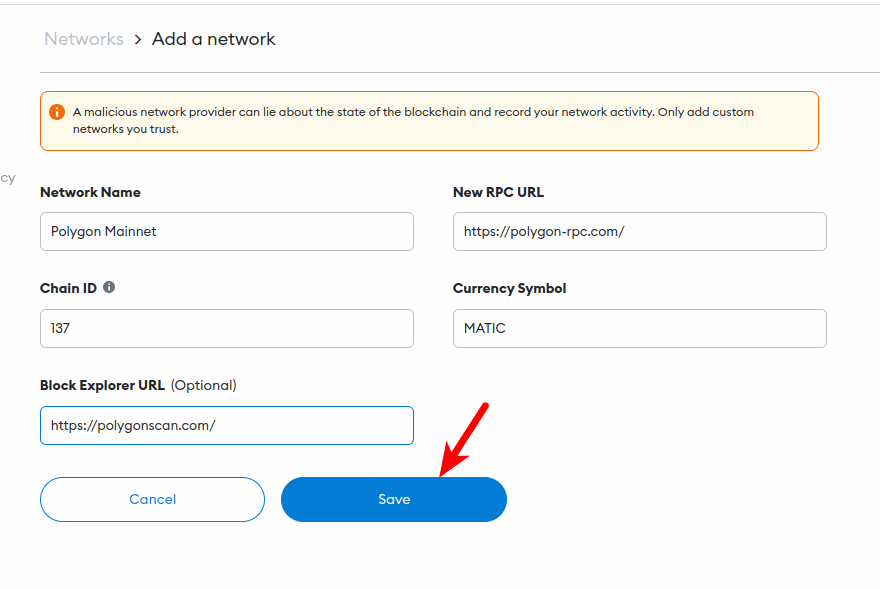
Step 4: Enter the Polygon Mainnet custom RPC endpoint and click [Save].
On the next page, input the custom RPC endpoint for the Polygon Main Network outlined below in the appropriate fields as seen in the next screenshot.
- Network Name: Polygon Mainnet
- New RPC URL: https://polygon-rpc.com/
- Chain ID: 137
- Currency Symbol: MATIC
- Block Explorer URL: https://polygonscan.com/
Once you have filled all the fields correctly with the appropriate details, click on [Save] to add the MATIC network to your Metamask wallet.
After this, the Polygon network should be added and selected automatically as the default network on your Metamask wallet.
If it is not selected, go back to the Metamask main window and click on the network drop-down button then select “Polygon Mainnet” from the list of available networks on the dialog.
How To Add Polygon To Metamask Mobile App (Android & iOS)
Adding the Polygon Network to your wallet on the Metamask mobile app is quite easier and requires less technicality when compared to the process of doing the same on the Metamask browser extension on desktop.
On the Metamask mobile app, some of the popular networks (Polygon network is included) are already pre-configured, all you need to do is select the network to be added and tap on [Approve] and it will be added automatically to your wallet without any additional steps.
To add the Polygon network to your wallet on the Metamask mobile app, follow the steps below.
Step 1: Launch the Metamask app and unlock your wallet.
Launch the Metamask app on your mobile device and enter your account password to unlock the app.
Depending on the device and OS, you may be able to unlock your wallet using any of the available biometric methods including Face ID, Fingerprint, or Face Unlock if enabled on your Metamask account.
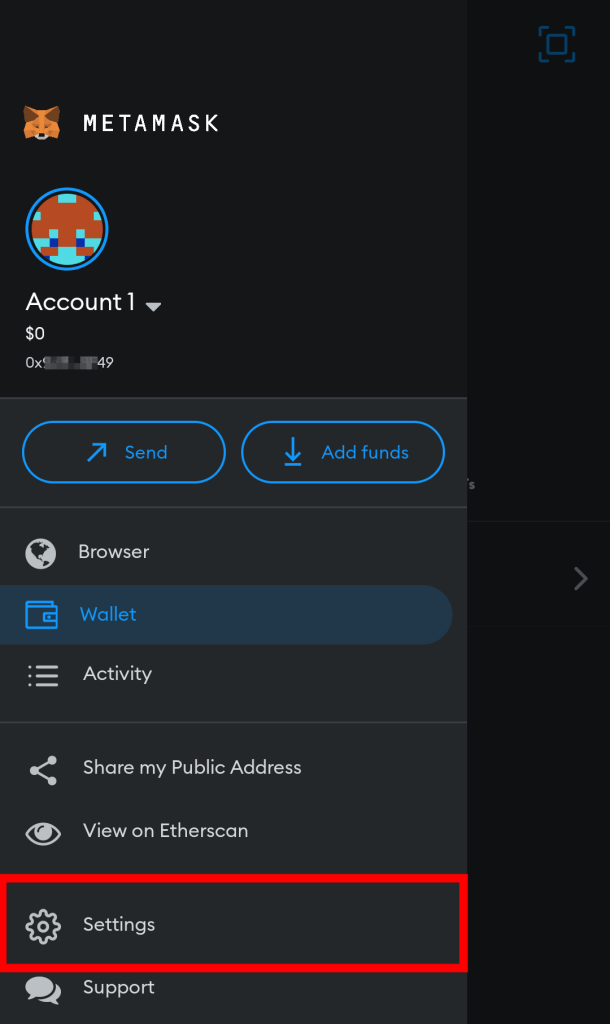
Once your wallet is unlocked, tap on the Menu Icon on the top left corner of the Metamask app home screen/dashboard.
Next, select [Settings] from the menu items.
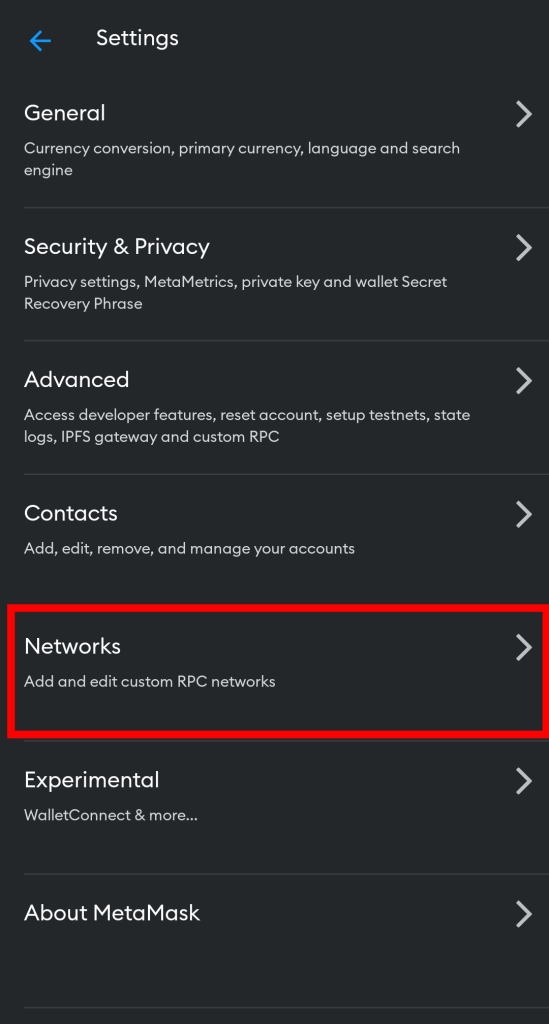
Step 4: Select [Networks] on the Settings page.
On the Metamask app Settings page, select [Networks] to view all available networks on your wallet.
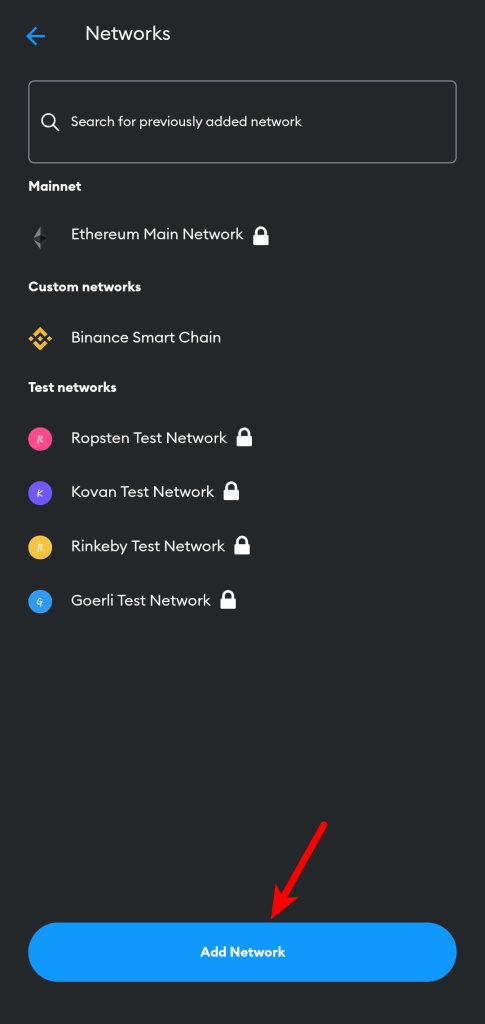
Step 5: Now, tap [Add Network].
Now, tap on [Add Network] to add a new network to your wallet.
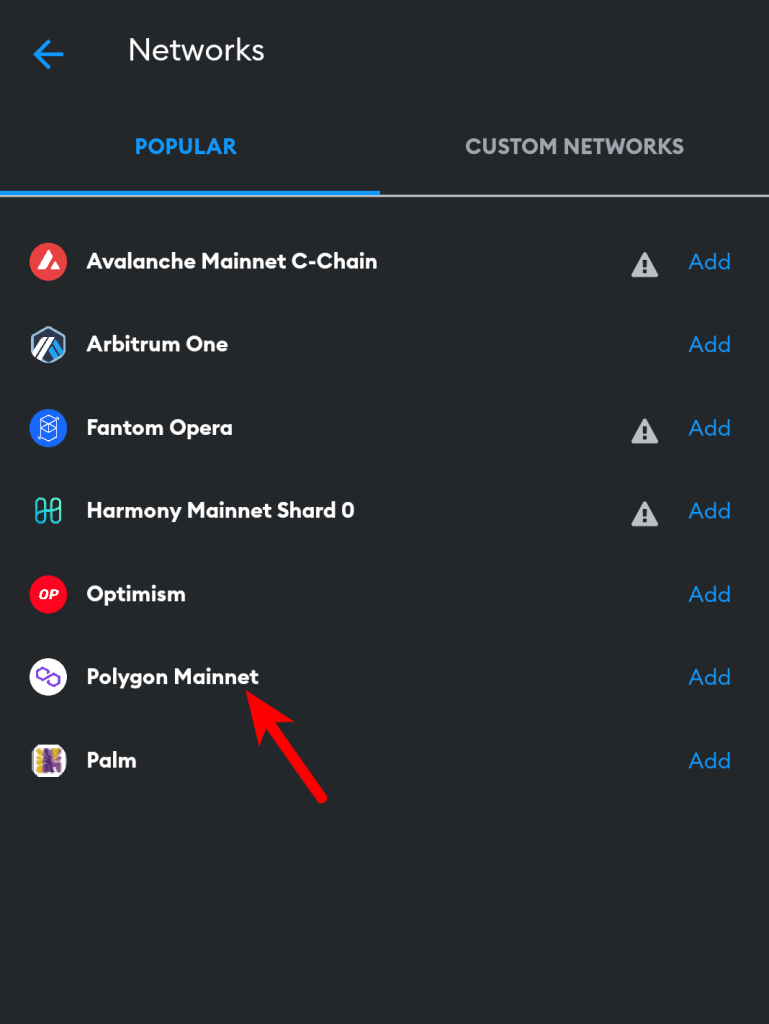
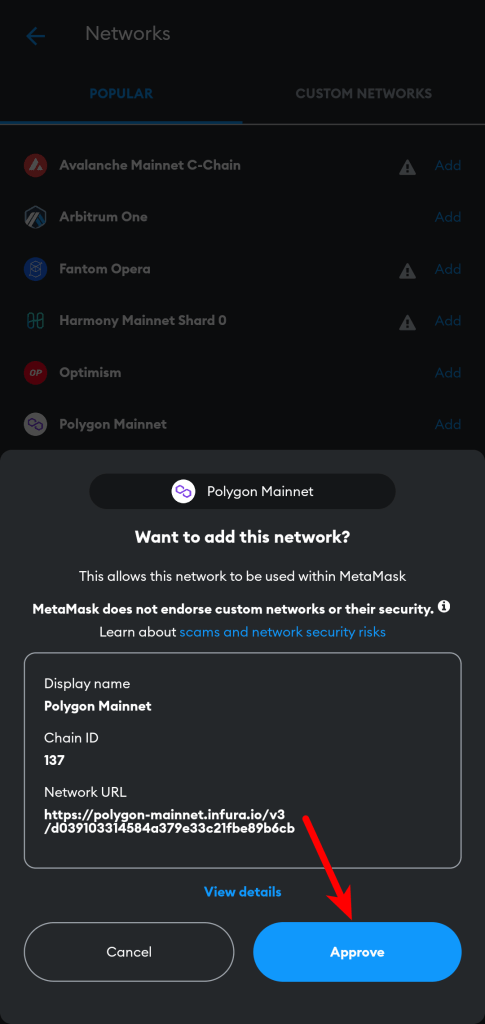
Step 6: Select [Polygon Mainnet] from the list on the “Popular” tab.
On the “Popular” tab, tap on [Polygon Mainnet] to add the MATIC Mainnet to your wallet.
Step 7: Tap on [Approve] to add the network.
Finally, tap on [Approve] to add the network to your Metamask wallet.
After this, the Polygon network should be added to your wallet and selected as the default network on the Metamask app on your device.
How Transfer Polygon To Your Metamask Wallet Easily
To fully utilize your Metamask wallet on the Polygon network, you need to transfer some MATIC tokens (the native token of the Polygon network) from an external wallet or crypto exchange account (that holds some value in MATIC) to your Metamask wallet.
If you don’t currently hold any MATIC tokens, we recommend using Binance to purchase some MATIC since the cryptocurrency is supported by the exchange, and most importantly, it can be transferred out to external wallets like Metamask.
You can sign up for a free Binance account using this link.
Once you have created an account on Binance, purchase some MATIC using your credit/debit card, direct bank deposit, third-party payment providers, or via P2P before moving on with the guide below. Binance provides an excellent tutorial on how to do that in this article.
To send MATIC from Binance to your Metamask Wallet, you need to copy your default Metamask wallet address since Metamask only provides one wallet address which is used across multiple (configured) blockchains/networks on your wallet and this includes the Polygon network.
Now that you have your Metamask wallet address which is also your MATIC wallet address, head over to the Binance mobile app or web dashboard, then tap on [Wallets], and select [Funding] to navigate to your funding wallet.
Next, tap on [Withdraw], search for “MATIC” and select “MATIC Polygon” from the results. Now, select [Send via Crypto Network] from the bottom dialog.
On the next page, enter your Metamask MATIC wallet address in the wallet address section then select “Polygon” as the network to be used for the transaction.
Enter the amount of Polygon (MATIC) tokens to be transferred to your Metamask wallet from Binance and tap on [Withdrawal].
Now, tap on [Submit] and complete the 2-step verification by providing the code sent to your phone number, email, and/or authenticator app (Google or Binance authenticator).
Finally, head back to your Metamask wallet and refresh your MATIC balance to view the updated balance.
The transaction can take anywhere from 5 – 20 mins to complete so you have to be a bit patient just in case the tokens aren’t available in your wallet yet.
How To Add ETH To Polygon Network On Metamask
To add ETH to the Polygon on Metamask, you first need to add the Polygon Mainnet to your Metamask wallet as explained in the guide above.
Since there is no Native Ethereum deployed on the Polygon chain, you will need to add the Wrapped version of Ethereum (WETH) to the Polygon network on your Metamask wallet if you want to trade with ETH on the Polygon network.
While Wrapped Ether (WETH) is not the native Ether (ETH) token we all know, it is the ERC-20 compatible version of Ether and it has the same value as the ETH token since WETH is created by sending ETH to a smart contract where the ETH is placed on hold until it ready to be redeemed.
Now that you have a basic understanding of what WETH is, let’s learn how to add it to your Metamask wallet on the Polygon network.
First, you will need to get the Contract Address for WETH on Polygon. The correct contract address for WETH on the Polygon network is “0x7ceb23fd6bc0add59e62ac25578270cff1b9f619” and you can find the contract on the Polygonscan explorer.
Now that you have the contract address of WETH on Polygon, you can go ahead and add WETH to your Metamask wallet on the Polygon network using this contract address.
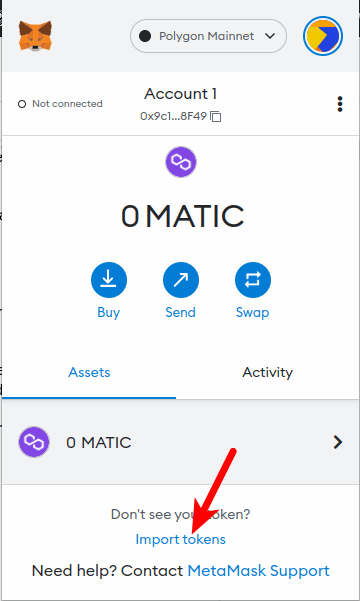
To do this, launch the Metamask extension and ensure that the Polygon Mainnet is added and selected as the default network on your wallet (refer to the guide above if you haven’t done this).
Now, on the Metamask main window, click on [Import tokens].
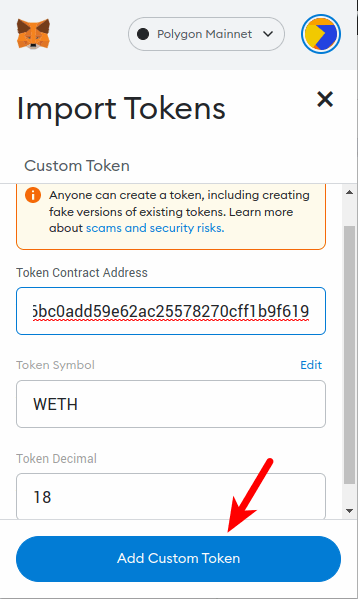
On the new window, paste in the contract address for Polygon WETH (0x7ceb23fd6bc0add59e62ac25578270cff1b9f619) in the “Token Contract Address” section and wait for some seconds for Metamask to automatically input the Token Symbol and Decimal.
Click on [Add Custom Token].
Finally, click on [Import Tokens] to add Polygon ETH to your Metamask wallet.
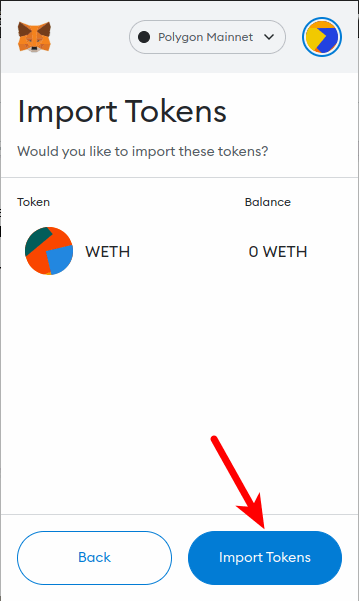
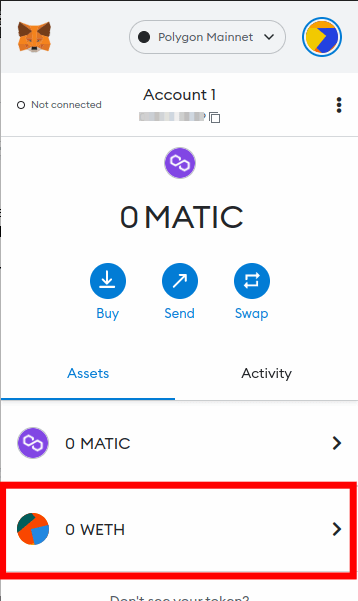
After this, you should see your Polygon WETH balance Metmask and you can transfer WETH to your Metamask wallet address using the Polygon network.
Wrapping Up
Well, that’s it. You have successfully added the Polygon network to your Metamask wallet if you followed this guide to the end.
Since the Polygon network is a side chain of Ethereum and an EVM-compatible network, it can be added to Metamask just like other blockchains which are compatible with the Ethereum Virtual Machine (EVM).
To add Polygon to your Metamask wallet, you first need to get the correct custom RPC endpoint for the Polygon Mainnet.
Once you have the RPC details (which were included earlier in the article), you can then head over to the Metamask extension and add the network to your wallet using these RPC details including the Network name, RPC URL, Chain ID, Symbol and Block Explorer URL.
On the Metamask mobile app, things are less technical when adding some of the popular networks to your wallet since these networks come pre-configured on the app.
To add MATIC to your wallet on the Metamask mobile app, you just need to select it from the list of preconfigured networks and tap on [Approve].
