
Ethereum and Avalanche are similar blockchains and both blockchains utilize the Proof Of Stake consensus mechanism for processing transactions and creating new blocks.
Since both networks support smart contracts, Ethereum and Avalanche are the biggest names in the DeFi space with hundreds of new DApps and tokens being deployed on both chains daily.
Most of the top cryptocurrencies on Ethereum are also available on Avalanche and to move your assets from one blockchain to another and back, you will need to use a cross-chain bridge.
Cross-chain or crypto bridges are simply protocols that allow users to transfer crypto assets from one blockchain to another with minimal fees when possible.
If you have some crypto assets that you would like to move from Ethereum to Avalanche, we’ve got you covered. In this article, you will learn how to bridge from Ethereum to Avalanche easily using any Ethereum-compatible wallet of your choice.
How To Bridge From ETH To AVAX Quickly
- Open Metamask and fund your wallet with ETH.
- Add Avalanche network to your Metamask wallet
- Visit Core.app (Avalanche Bridge) on your browser.
- Hit [Connect Wallet].
- Approve the connection on Metamask.
- Select the token to bridge and enter an amount.
- Click [Bridge Tokens].
- Swap WETH.e for AVAX.
How To Bridge From Ethereum To Avalanche (Step By Step Guide)
To transfer tokens from the Ethereum blockchain to Avalanche, you need to use a cross-chain bridge that is compatible with both Ethereum and Avalanche.
The Avalanche Core bridge which is developed by the creators of the Avalanche blockchain – Ava Labs – is our recommended bridge when bridging from Ethereum To Avalanche. The bridge allows users to easily bridge any supported token from Ethereum to Avalanche.
To use the Avalanche Bridge, you first have to connect your wallet to the platform and approve the connection. After connecting your wallet to Core, select the token you want to bridge, enter an amount and click [Bridge Tokens] to bridge to Avalanche from Ethereum.
Below is a step-by-step guide showing how you can bridge from Ethereum to Avalanche.
Step 1: Launch Metamask and fund your wallet with ETH.
Launch the Metamask extension on your web browser, unlock your wallet with your Metamask account password and transfer some ETH to your Metamask ETH wallet address.
You can use a centralized exchange like Binance to purchase ETH and transfer it to your Metamask wallet address.
Step 2: Add Avalanche network to your Metamask wallet.
Next, you will need to add the Avalanche Network to your Metamask wallet. You can either add the network to your wallet by inputting the RPC details of the Avalanche Mainnet manually or automatically via ChainList.
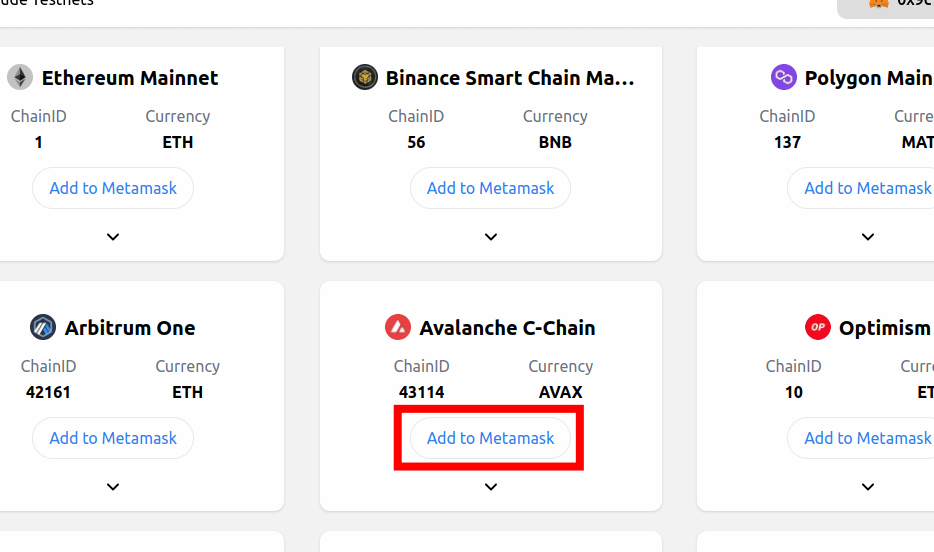
To add the Avalanche mainnet to your Metamask wallet automatically via ChainList, visit the ChainList website, connect your wallet to the platform and approve the connection on the pop-up Metamask window.
Next, click [Add to Metamask] under Avalanche C-Chain then approve the action on Metamask to add the network to your wallet.
You can find a detailed guide on how to do this in our article about adding Avalanche to Metamask.
If you do not use Metamask, then you can skip this step since most wallets including Coinbase Wallet and Trust Wallet have the Avalanche network enabled by default.
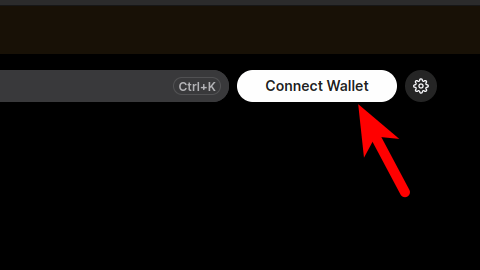
Step 3: Open the Avalanche Core Bridge website and connect your wallet.
After adding the Avalanche Mainnet to your Metamask wallet, open the Avalanche Core Bridge [https://core.app/bridge/] on your web browser and click [Connect Wallet].
Next, select Metamask from the list of compatible wallets and wallet connection protocols. If you don’t use Metamask, select the wallet you use from the list (Coinbase Wallet, WalletConnet for Trust Wallet, etc) and agree to the terms and conditions.
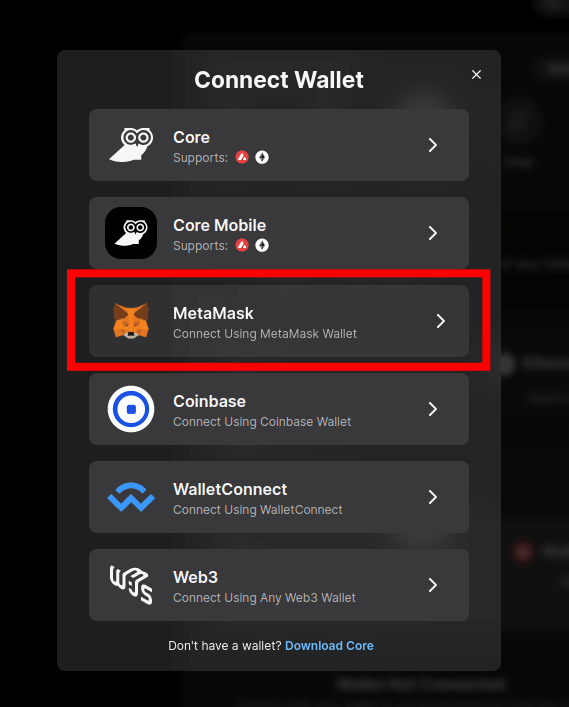
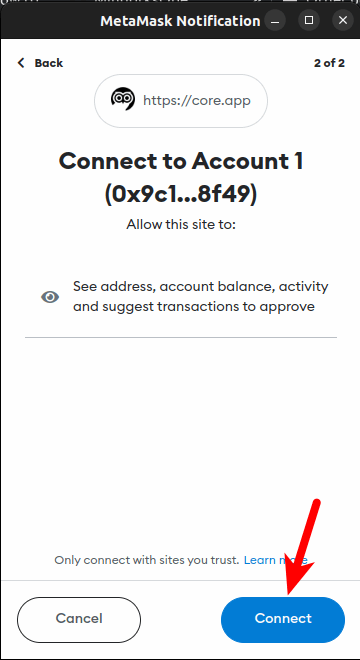
Next, select the account (or accounts) you want to connect to the platform and approve the connection on the next Metamask window.
Step 4: Select the token to bridge, enter an amount and click [Bridge Tokens].
Now that your wallet is connected, select the token you want to swap in the “From” section on the Avalanche Core Bridge page and enter an amount. You can click [Max] to set the amount to max available amount of the selected token on your wallet.
For this article, we will be leaving the default selection which is ETH since we want to bridge ETH to AVAX. As mentioned earlier, you can select any token of your choice from the list of tokens supported by the bridge – USDT, USDC, DAI, WETH, and more.
After selecting the token to be bridged and setting an amount, click [Bridge Tokens].

Step 5: Confirm the transaction on Metamask.
Now, you should see a pop-up Metamask window. Review the amount and associated gas fees then hit [Confrim] to approve the transaction.
After confirming the transaction on your wallet, simply wait for the bridging process to complete – this could take anywhere from a few seconds to 5 minutes depending on the current network conditions.
Step 6: Swap WETH.e for AVAX.
After bridging ETH from Ethereum to Avalanche, you should see your ETH balance on your Metamask wallet in the form of “WETH.e”. WETH.e is a representation of the Ether token (ETH) on the Avalanche blockchain.
To convert WETH.e to AVAX, you have to use a crypto exchange that supports swapping tokens on the Avalanche blockchain.
Although you can swap WETH for AVAX on many of the popular centralized exchanges, we generally recommend sticking with a trusted decentralized exchange for simple token swaps as they are easier and faster to use for token swaps.
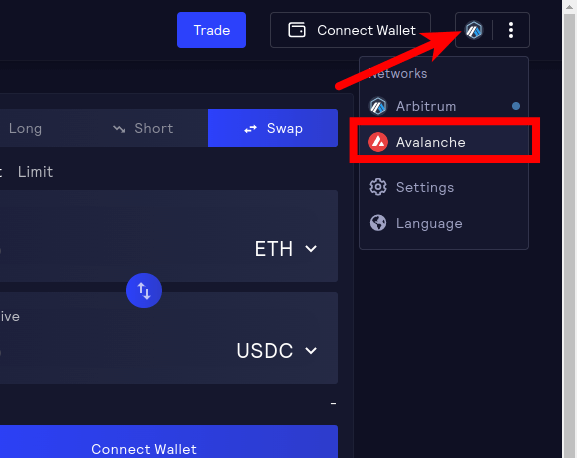
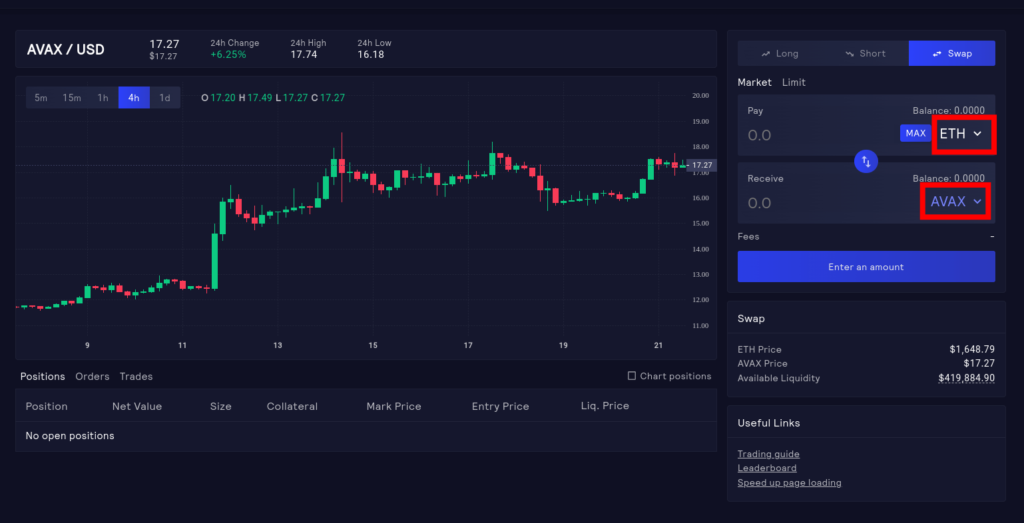
To trade your WETH.e for AVAX, visit the GMX Exchange website [https://app.gmx.io/#/trade] and switch networks on the platform to Avalanche.
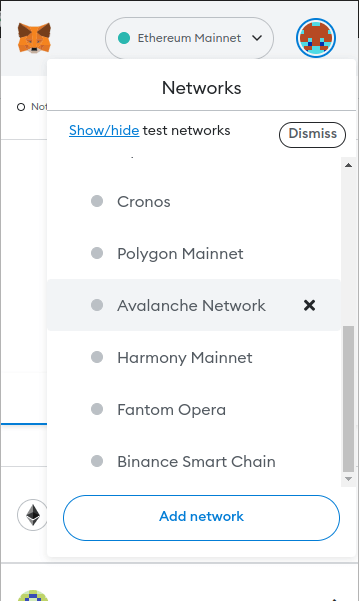
Next switch the network on Metamask to the Avalanche Mainnet.
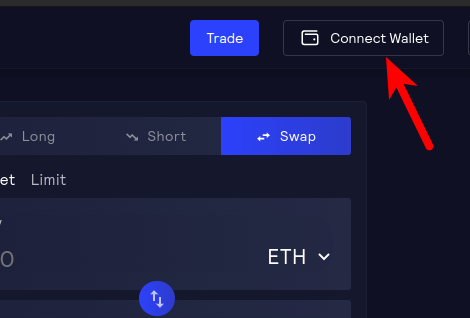
Next, click [Connect Wallet], select your wallet of choice (Metamask in our case) then approve the connection on the popup window.
After your wallet must have been connected to the exchange, switch to the Swap tab, select “WETH.e” as the token to be swapped, and “AVAX” as the token to be received.
Now enter the amount of ETH (WETH.e) you intend to swap or hit [MAX] to swap all available WETH.e on your wallet then click [Swap].
The transaction should be completed in a few seconds and once the transaction is complete, the AVAX balance on your wallet should be updated to reflect your newly swapped funds.
And with this, you have successfully bridged ETH to AVAX. Using this method, you can bridge any popular token including stablecoins like USDT, USDC, and DAI which are available on both Ethereum and Avalanche.
How Much Does It Cost To Bridge From ETH To AVAX?
Like with every transaction on the blockchain, there are some fees you would have to pay when bridging from Ethereum to Avalanche.
There are 3 fees to consider when you want to bridge from ETH to AVAX. The first one is the fee you pay to transfer ETH or any other crypto asset you want to bridge from an exchange to your crypto wallet.
The second fee is the fee you have to pay when using the Avalanche Bridge to bridge assets from Ethereum. Lastly, you also have to consider the fee which will be paid to convert from one token to another on the Avalanche blockchain e.g swapping from WETH.e to AVAX.
When bridging assets from Ethereum to Avalanche using the Avalanche Bridge, the bridge fee is currently $3 worth of the ERC-20 asset being transferred. For example, if you intended to bridge ETH from Ethereum to Avalanche (WETH.e), you would have to pay $3 worth of ETH (ERC-20) as a bridge fee.
Since fees on the Avalanche blockchain are very cheap when compared to blockchains like Ethereum, you should expect to pay lower fees for simple token swaps. GMX charges 0.23% for token swaps on the Avalanche blockchain.
Wrapping Up
Moving crypto assets from Ethereum to Avalanche requires a cross-chain crypto bridge that is compatible with both blockchains.
Using the Avalanche Bridge you can bridge a good number of supported tokens from the Ethereum Mainnet to Avalanche in a few clicks.
To bridge from Ethereum to AVAX using the Avalanche bridge, you have to first ensure you have some ETH or the token you intend to bridge on your crypto wallet.
Next, open the Core.app website, connect your wallet, and approve the connection. After that select the token you want to bridge, enter an amount, click [Bridge Tokens] and confirm the transaction on your wallet.
After the transaction is complete, switch to the Avalanche Mainnet on your wallet and you should see an updated balance.
If you want to swap for other tokens on Avalanche, you can utilize a decentralized crypto exchange like GMX or TraderJoe which supports token swaps on the Avalanche Mainnet.
And that will be it for this guide. If you were searching for an ETH to AVAX bridge guide, we hope you found this article helpful.
