
The Ripple network is a real-time distributed open-source payment protocol that supports tokens representing fiat currencies, cryptocurrencies, commodities, and more on its XRP ledger.
XRP which is the native token of the XRP Ledger is one of the top cryptocurrencies available right now.
The token like many other cryptocurrencies can be used as an alternative method to bridge currencies and move funds around the world since the ledger offers faster transaction speeds and lower network/gas fees.
Metamask is the most recommended non-custodial crypto wallet out there. It is a decentralized and open-source wallet that is used to send, receive, swap, trade, and store cryptocurrencies and crypto assets across multiple (compatible) blockchains.
If you currently hold some XRP tokens on your crypto exchange account or crypto wallet, you might be wondering if it is possible to transfer XRP to your Metamask wallet.
Well, in this article, you will learn how to add XRP to Metamask. The article will include guides on how to add XRP to your wallet on both the Metamask extension and mobile app for Android or iOS.
Can You Add The Ripple Network To Metamask?
No, you cannot add the Ripple Network and its native token – XRP – to your Metamask wallet because the Ripple network is not compatible with Metamask.
Only blockchains that are compatible with the Ethereum Virtual Machine (EVM) can be added to Metamask via specific custom RPC endpoints provided by the developers of the blockchain.
Since the Ripple Network is not an EVM-compatible network, it cannot be added to your Metamask wallet.
How To Add XRP To Metamask (Alternative Methods)
While you’re unable to add the native XRP token to your wallet since the XRP Network (or XRP Ledger) is not compatible with Metamask, you can get the XRP token on your Metamsk wallet using some alternative methods which will be outlined below.
One method is to add the Binance-Pegged version of XRP to your Metamask wallet via the Binance Smart Chain network.
Binance-Pegged tokens are simply a representation of a token (or tokens) on the Binance Smart Chain on a 1:1 ratio. The Binance-Pegged XRP token is a representation of XRP on the BSC network.
If you don’t consider using Binance-Pegged XRP as an option, you can simply download and configure an alternative wallet which is compatible with the XRP Ledger by default to get the native XRP token on your device.
Both alternative methods are discussed in detail below.
Method 1: Add XRP To Metamask via the Binance Smart Chain.
The first alternative method you can use to get XRP on your Metamask wallet is by adding the Binance-Pegged version of the XRP token to your wallet using the Binance Smart Chain.
While this is not the native XRP token that is used on the Ripple network, it is the Binance-Pegged version of the token which carries the same value as the native XRP token.
Binance Pegged tokens are 100% backed by the native coin in reserve and the reserve addresses are published for anyone to audit.
One Binance-Peg XRP holds the same value as 1 XRP just that both tokens are deployed on different blockchains. You can also convert the Binance-Peg XRP to native XRP and vice versa using the Binance bridge on the Binance exchange.
Below is how you can add Binance-Pegged XRP to your Metamask wallet easily.
Step 1: Copy the contract address for Binance-Pegged XRP.
To add the Binance-Pegged XRP token to your Metamask wallet, you need the correct contract address for the token.
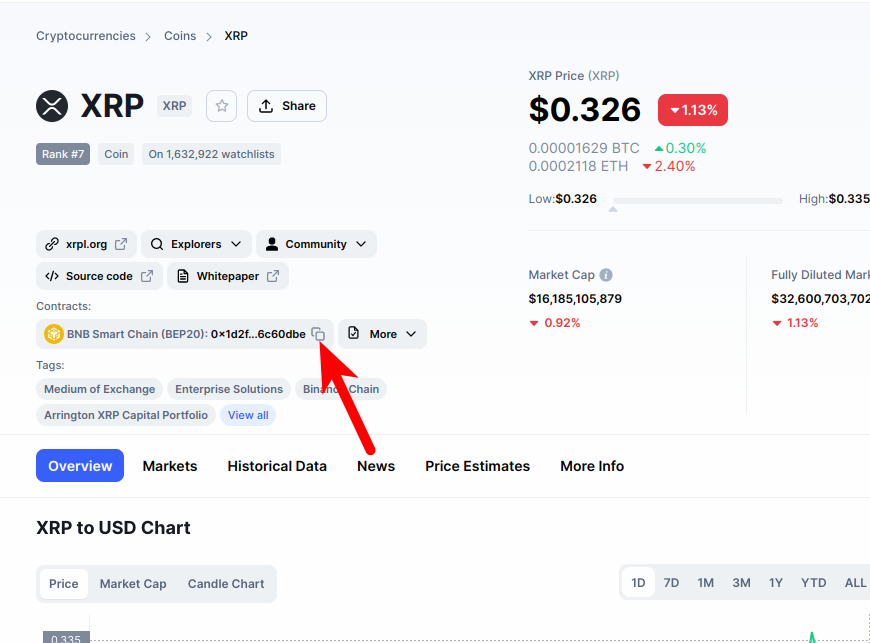
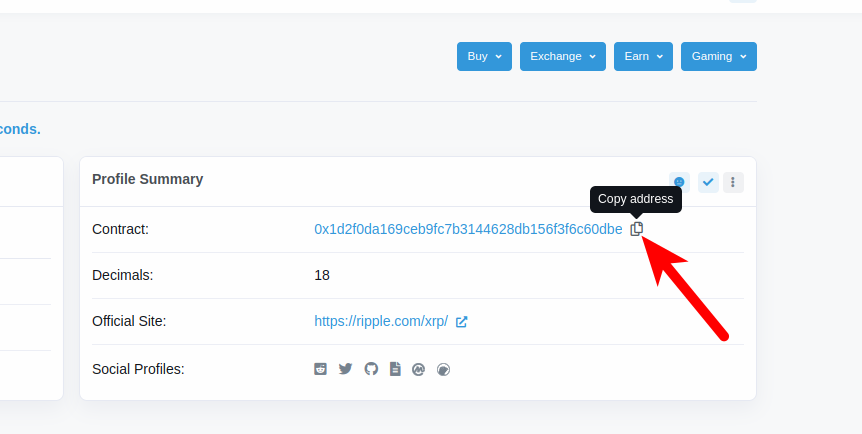
The contract address for Binance-Pegged XRP can be found on the Binance-Pegged XRP contract page on BSCScan. The correct contract address for Binance-Pegged XRP is “0x1d2f0da169ceb9fc7b3144628db156f3f6c60dbe” so go ahead and copy that to your device clipboard.
Alternatively, you can visit the Binance-Peg XRP contract page on BSCScan or the official XRP token page on CoinMarketCap and copy the contract address directly from there.
Step 2: Launch the Metamask extension and enter your password.
Next, launch the Metamask extension and enter the account password to unlock your wallet.
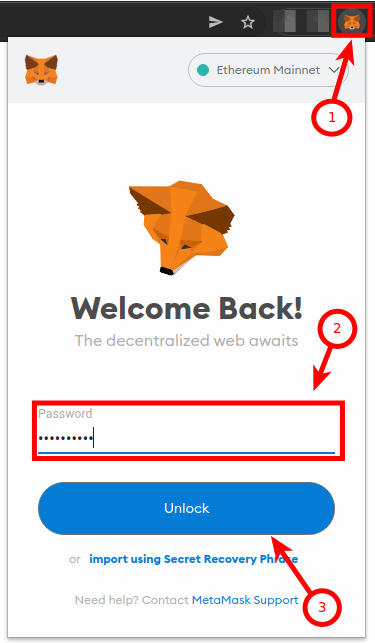
If you use the Metamask app on your mobile device, then you can simply unlock your wallet using any of the available biometric methods like Face ID, fingerprint, PIN, or Face Unlock.
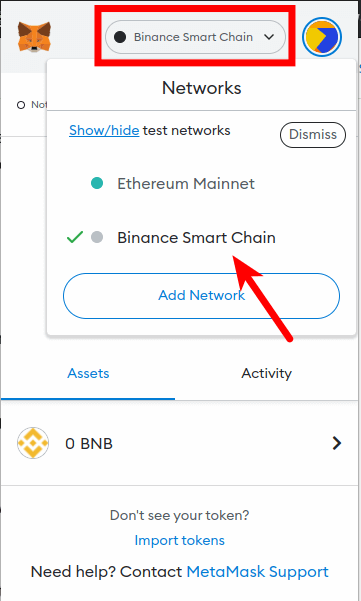
Step 3: Ensure Binance Smart Chain is the selected network.
Since we’re adding XRP (Binance-Pegged) to Metamask via the Binance Smart Chain, you want to make sure that you have already added the Binance Smart Chain network to your Metamask wallet and selected it as the default network.
If you haven’t added the Binance Smart Chain to your Metamask wallet, we have a good tutorial on how to add BSC to Metamask easily on both the extension and mobile app. You will need to follow the steps in that article to add the network to your Metamask wallet before moving forward with this guide.
Once you have added the Binance Smart Chain network to your wallet, go ahead and select it as the default network as in the screenshot below.
Step 4: Click on [Import tokens].
Now that you have selected the correct network, scroll down on the Metamask window and click on [Import tokens].

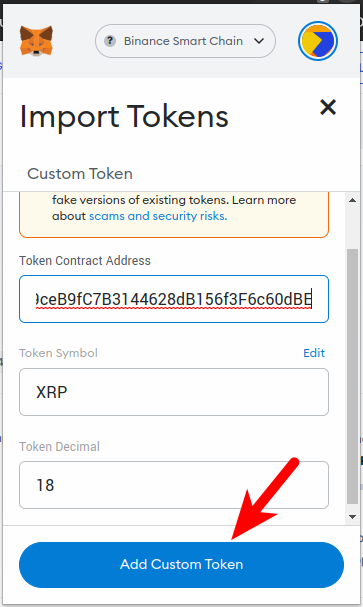
Step 5: Paste the Contract Address and click [Add Custom Token].
Now paste in the Binance-Pegged XRP contract address you copied earlier and wait a few seconds for Metamask to automatically fetch the Token Symbol and Ticker.
Once that’s done, click on [Add Custom Token].
Finally, click on [Import Tokens] to add Binance-Pegged XRP to your Metamask wallet.
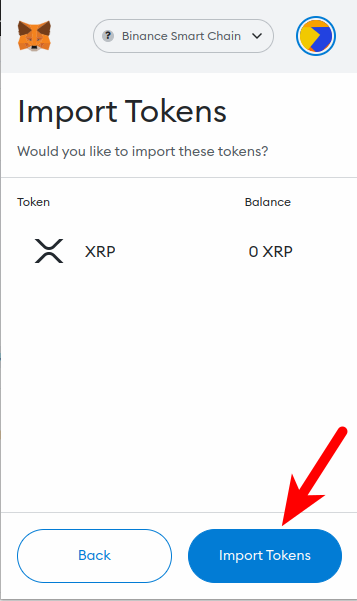
With this, you have successfully added XRP to your Metamask wallet on the Binance Smart Chain.
Note: You can not send native XRP tokens to your Metamask Binance-Pegged XRP wallet address and this is because these two tokens are deployed on different blockchains even though they have the same value.
Sending native XRP tokens to your Metamask wallet will result in a permanent loss of funds. You can only send XRP to your wallet on Metamask using the Binance Smart Chain (BEP20) network.
Some crypto exchanges like Binance allow you to XRP to an external wallet (Metamask in this case) using multiple networks.
If you’re sending XRP from your Binance account to Metamask, ensure you select “BNB Smart Chain (BEP20)” as the network to be used for the transaction else you may lose your funds permanently.
Method 2: Install A Crypto Wallet With Native XRP Support.
Since Metamask is not compatible with the native XRP network (XRP Ledger) at the moment, there is no way to receive or store native XRP tokens on your Metamask wallet.
If you don’t consider storing XRP on your Metamask wallet via the Binance Smart Chain as an option, then the only option left is to download and install another crypto wallet that is compatible with native XRP by default.
There are quite a handful of crypto wallets out there that support native XRP by default and below are some of our picks on wallets you can use to hold XRP on your device.
1) Atomic Wallet
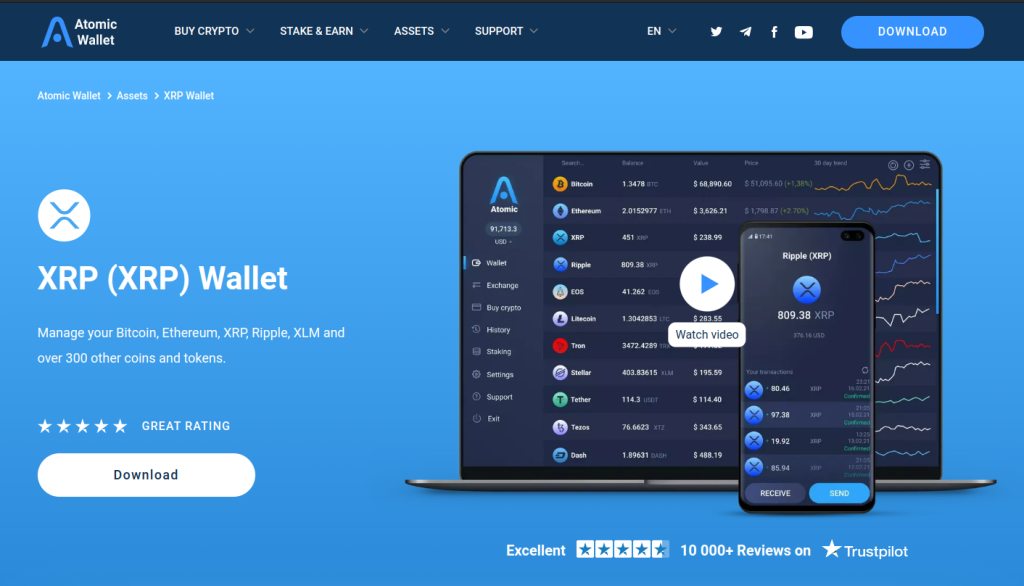
Atomic Wallet is also one of the leading crypto wallets out there. It is a multi-currency non-custodial wallet that can be used to send, receive and store XRP and 300+ other cryptocurrencies across multiple blockchains.
The wallet is available as standalone desktop software on Windows, Mac, and Linux systems and a mobile app for users on Android and iOS mobile operating systems.
2) Trust Wallet
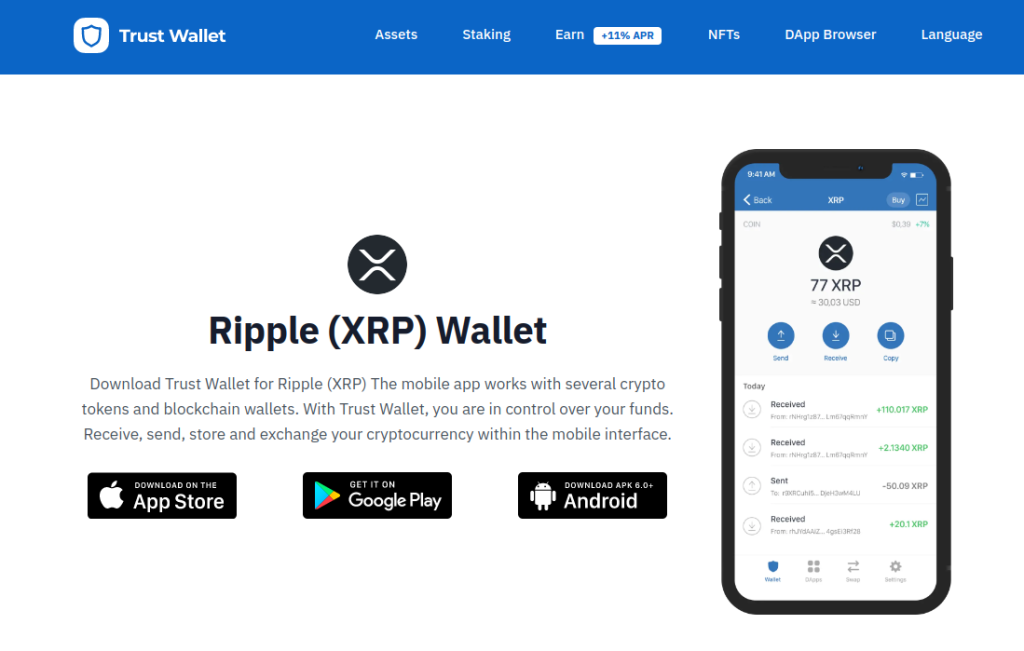
Trust Wallet is another popular non-custodial crypto wallet that supports the XRP network. The wallet is a mobile wallet that is available on Android and iOS devices and also on desktops as a web browser extension.
To use Trust Wallet, all you have to do is download the app from the default app store on your device – Apple App Store for iPhones and Google Play store for Android devices.
Once the app is installed on your device, create a new wallet and note down your Trust Wallet recovery phrase, then copy your XRP deposit address and transfer your XRP tokens to that address.
3) Coinbase Wallet
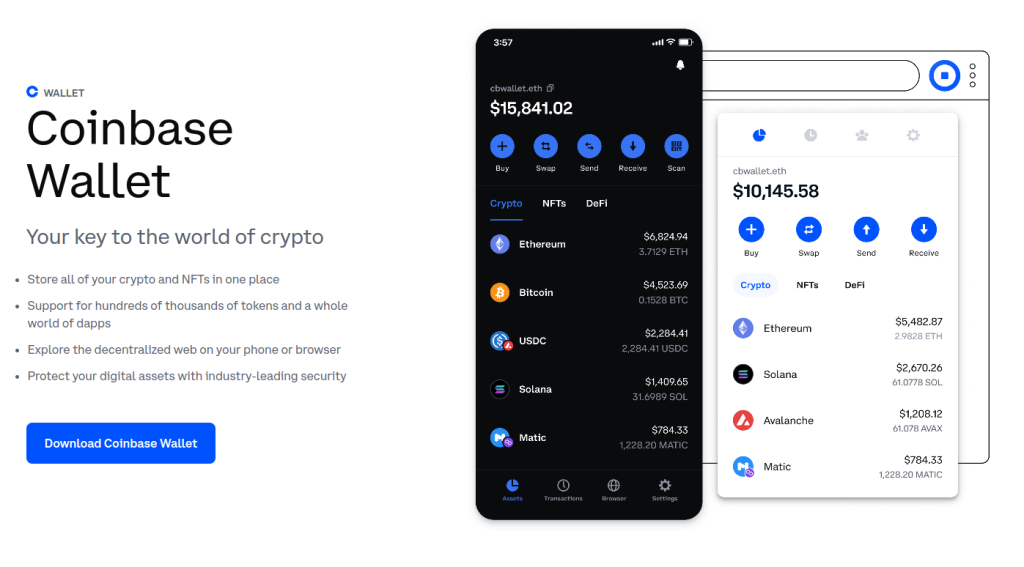
The Coinbase Wallet is a crypto wallet that is backed by one of the biggest crypto exchanges – Coinbase. Unlike Metamask, the native XRP network is supported on the Coinbase wallet by default.
Coinbase wallet is available as a mobile app (for Android & iOS devices) and as a web browser extension for desktop devices (Mac, Windows, and Linux systems).
To get XRP on the Coinbase Wallet, simply download and install the mobile app from the app store on your Android device/iPhone or the extension from the Chrome Webstore if you’re on a desktop computer/laptop.
Once the wallet app is installed on your device, simply select your XRP balance then click on [Copy] to copy your XRP wallet address on Coinbase wallet.
After this, you can transfer any amount of XRP to the address you copied from an exchange or wallet using the native XRP network.
Wrapping Up
You’re currently unable to add the native XRP token to your Metamask wallet because the Ripple blockchain is not EVM-compatible and Metamask can only be configured to work with blockchains that are compatible with the Ethereum Virtual Machine.
You can however add the Binance-Pegged version of the XRP token (Binance-Pegged XRP) to your Metamask wallet via the Binance Smart Chain Network by manually inputting the correct contract address of the token into your Metamask wallet.
Alternatively, you can also use a different wallet entirely that comes with native Ripple network support. Some recommended wallets that support XRP natively include Atomic Wallet, Trust Wallet, and the Coinbase Wallet.
If you were searching for a guide on how to add XRP to Metamask, we hope you found this guide helpful.
