

The Rinkeby network is one of the three major testnets used by developers on the Ethereum blockchain. In simple terms, Rinkeby is used by developers to deploy and test a version of a project to simulate real-world use on the Ethereum blockchain since it is an Ethereum Test Network.
Metamask on the other hand is an open source non-custodial wallet that is used to send, receive, stake, and trade various crypto assets across multiple compatible blockchains. It is the most popular non-custodial wallet in the crypto space and the go-to choice when it comes to crypto wallets for many crypto enthusiasts.
The Rinkeby testnet is an EVM-compatible network that essentially mimics the Ethereum blockchain since it is an “Ethereum testnet”. This means that the network can be configured on any Metamask wallet in just a few steps.
In the guide, you will learn how to add the Rinkeby network to your Metamask wallet easily on both the Metamask browser extension and mobile app for Android & iOS.
How To Add Rinkeby Testnet To Metamask Quickly
- Launch the Metamask extension/mobile app and unlock your account.
- Click on the network dropdown box.
- Now, click on Show/hide test networks.
- Toggle the button ON to show test networks.
- Go back and click on the network dropdown box again.
- Now select [Rinkeby Test Network] from the list of available networks.
- Transfer Rinkeby Testnet ETH to your Metamask wallet.
How To Add The Rinkeby Network To Metamask (Step By Step Guide)
The Rinkeby Test Network is already preconfigured on every Metamask installation but is hidden by default. All you have to do to add the network to your Metamask wallet is show all available test networks and select “Rinkeby Test Network” from the list.
Below is a step-by-step guide on how you can add the Rinkeby network to your Metamask wallet easily.
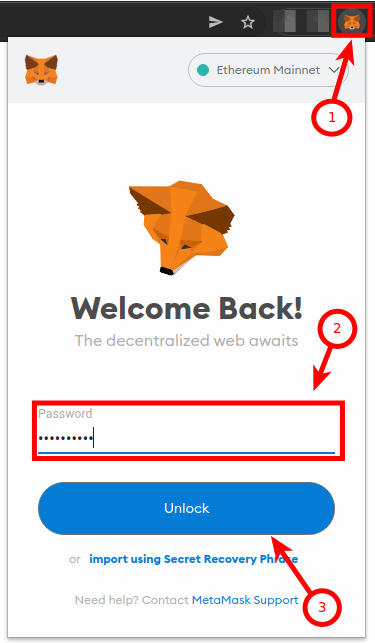
Step 1: Launch Metamask and input your account password to unlock the wallet.
If you haven’t installed the Metamask extension on your browser, you can get the correct version for your browser on the Metamask download page. If you have already installed the extension, you can skip this step since installing again will not be needed.
Once you have the extension installed and correctly set up, click on the Metamask logo/icon in the extensions area of your web browser to launch the Metamask main window.
Enter your account password and click on [Unlock] to unlock your wallet.
Step 2: Click on the network dropdown box.
On the Metamask main window, click on Network Dropdown Box to reveal a dialog with all available (configured) networks on your Metamask wallet.

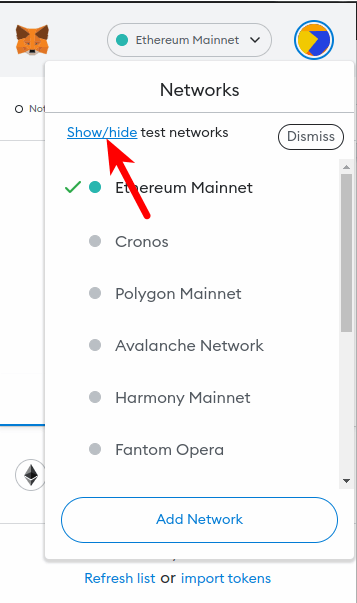
Step 3: Click on “Show/hide test networks”.
On the Network dialog which shows all available networks on your wallet, click on [Show/hide test networks].
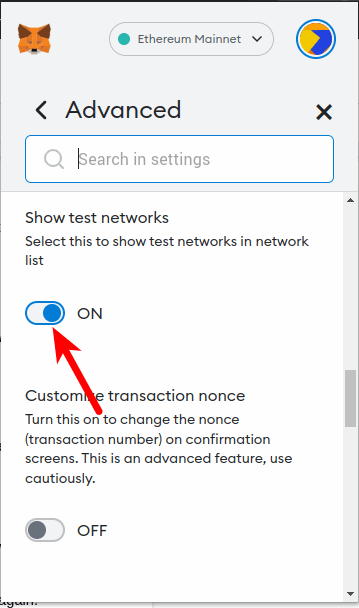
Once you click on [Show/hide], you should be redirected to the Metamask settings page. Under the “Show test networks” section, toggle the button ON to show all pre-configured test networks on your wallet.
Step 5: Go back to the Metamask main window and click on the network dropdown box again.
Now go back to the main Metamask window and click on the Network Dropdown Box again.
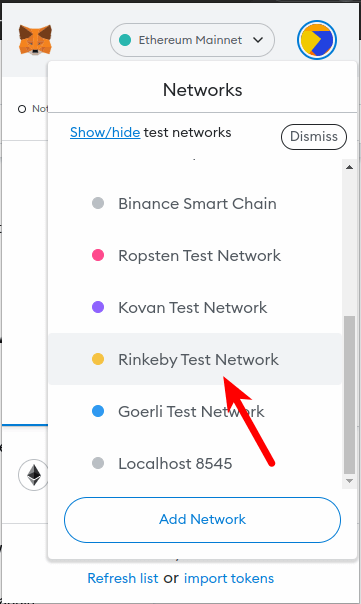
Step 6: Finally, select [Rinkeby Test Network] to set it as the default network on your wallet.
Finally, scroll down and select [Rinkeby Test Network] from the list of available networks on the network dropdown box to add the network to your wallet and select it as the default network.
With that, you have successfully added the Rinkeby test network to your wallet on the Metamask browser extension.
How To Add Rinkeby Network On The Metamask Mobile App (Android & iOS)
Adding the Rinkeby network to your Metamask wallet via the Metamask mobile app on Android or iOS is a little bit similar to the process of doing the same on the Metamask wallet browser extension.
Below is how you can add the Rinkeby Test Network to your wallet on the Metamask mobile app.
Step 1: Launch the Metamask app and unlock your wallet.
Launch the Metamask app on your mobile device and enter your account password to unlock the app.
Depending on the device and OS, you may be able to unlock your wallet using any of the available biometric methods including Face ID, Fingerprint, or Face Unlock if enabled on your Metamask account.
Step 2: Tap on [Wallet].
Next, tap on [Wallet] at the center of the top menu bar to view all available (configured) networks.

Step 3: Finally, select [Rinkeby Test Network] to select the network on your wallet.
On the Networks pop-up dialog, tap on [Rinkeby Test Network] to switch to the Rinkeby Testnet on your Metamask wallet.

When this is done, the Rinkeby Testnet should be added and selected as the default network on your wallet. Metamask will attempt to inform you that your default network has been switched via a pop-up dialog. Tap on [Got it] to close the dialog.
With that, you have successfully added the Rinkeby network to your wallet on the Metamask mobile app.
How To Get Rinkeby Testnet ETH On Your Metamask Wallet
Ether tokens (ETH) on the Rinkeby Testnet are very easy to obtain and since they carry no real-world value, you don’t need to purchase them with fiat or swap from another cryptocurrency.
To get Rinkeby Testnet ETH on your Metamask wallet, you need to use the Rinkeby Faucet. The Rinkeby Faucet like many other crypto faucets allows you to generate crypto (Testnet Ether in this case) by completing simple tasks.
To request ETH from the Rinkeby Faucet, you first need to copy your Metamask wallet address.
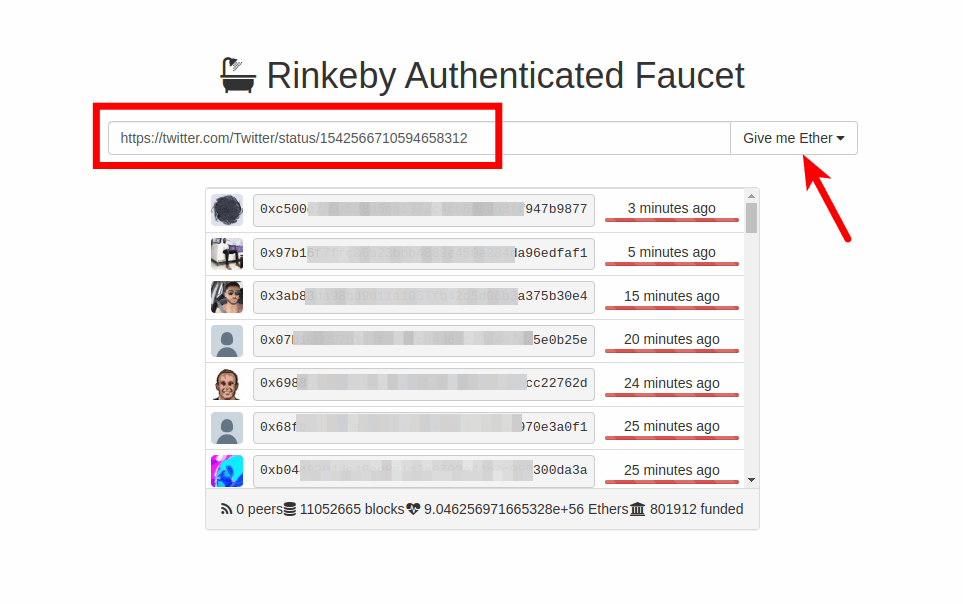
The Rinkeby Faucet requires anyone who wants to request funds to make a tweet on Twitter or a public post on Facebook with their wallet address included (surrounding text does not matter).
Facebook account or Twitter profile and create a public post (on Facebook) or a tweet (on Twitter) containing your wallet address.
Now copy the link to your Facebook post or Tweet and paste it into the input field on the Rinkeby Faucet, then click on [Give me Ether] and select the number of Ethers to be requested.
Finally, go back to your Metamask wallet and refresh your RinkebyETH balance to view your funds.
Can You Transfer Rinkeby ETH To Binance?
No, you cannot transfer Rinkeby ETH to Binance on the Ethereum mainnet because Rinkeby is a test network for Ethereum.
All Ether tokens issued on the Rinkeby network can only be used for testing purposes by devs on the Ethereum network and it carries no real-world value like the native ETH token or WETH (Wrapped Ether).
ETH on Ethereum test networks like Rinkeby is easy to obtain and in fact, you can obtain thousands of test Ether tokens from the various Rinkeby Faucets available on the internet.
So in simple terms, Rinkeby ETH or an Ether on any of the Ethereum test networks is basically “Fake Ether” that isn’t allowed to leave the testnet.
Wrapping Up
Well, that’s it. You have successfully added the Rinkeby test network to your Metamask wallet if you followed this guide up until this point.
Since the Rinkeby network is a test network for the Ethereum blockchain, it is EVM-compatible and can be added to Metamask just like other blockchains which are compatible with the Ethereum Virtual Machine (EVM).
Luckily, the Rinkeby Testnet comes pre-configured on both the Metamask browser extension and the mobile app so you don’t have to play around with the RPC endpoint details to get the network running on your wallet.
All you have to do is unhide the test networks on your wallet and select the [Rinkeby Test Network] as the default network to be used on your wallet. This is also the same process on the Metamask mobile app.
If you were looking for a way to add Rinkeby to Metamask, we hope you found this guide helpful.
