
Metamask is not just a wallet but an all-around tool for managing your wallets across various networks which are compatible with the wallet.
By default, Metamask only supports the Ethereum mainnet including tokens and other crypto assets deployed on the blockchain. If you want to use Metamask with other (compatible) networks, you have to add these networks to your wallet.
To add a network to your Metamask wallet, you need various details about the network including the network name, RPC URL, Chain ID, currency symbol, and block explorer URL. After getting these details, you have to input them manually on Metamask to add the network to your wallet.
While this method works for adding any EVM-compatible network to your Metamask wallet, there is a (faster) way to do it automatically using the ChainList website. Instead of manually inputting the RPC details, you can just click a button on ChainList to add any network to your wallet.
In this article, we will show you how to add a network to Metamask automatically using ChainList. This will include guides on how to use ChainList on both the Metamask extension and mobile app for Android devices and iPhones.
How To Add A Network To Metamask Automatically
- Open the ChainList website on a new tab.
- Click [Connect Wallet].
- Select an account on the Metamask window.
- Approve the connection.
- Search for the network you want to add to your wallet.
- Click [Add Network].
- Hit [Approve] on the Metmask window.
- Click [Switch Network] to switch to the network.
How To Add Any Network To Metamask Automatically Using ChainList (Step By Step Guide)
The ChainList website is an easy way to add any mainstream EVM-compatible network to your Metamask wallet automatically without having to go through the process of adding it manually via the RPC details of the network.
To add a network to Metamask automatically, open the ChainList.org website on your browser and connect your Metamask wallet to the platform.
After connecting your wallet to the platform, search for the network you want to add to your wallet using the search bar available on the ChainList homepage. Next, click [Add Wallet] under your selected network and approve the action on your wallet to add the network to Metamask.
Below is a step-by-step guide (with screenshots) showing how you can add a network to Metamask automatically using ChainList.
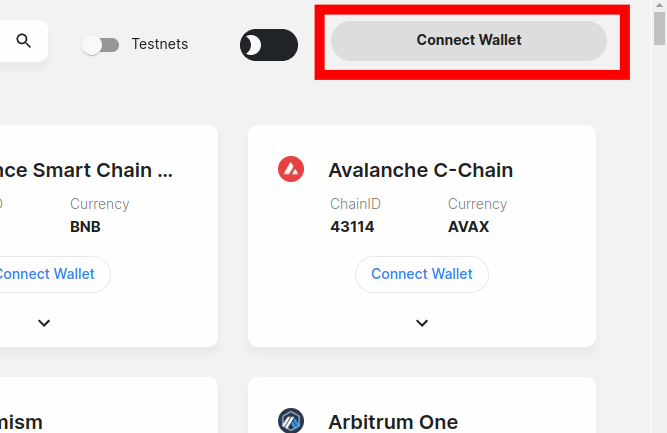
Step 1: Open the ChainList website and connect your Metamask wallet.
Open the ChainList website [https://chainlist.org/] on a new tab on your web browser then click [Connect Wallet] on the homepage to connect your wallet to the platform.
Step 2: Approve the connection.
Now, you should see a new Metamask window with a list of accounts on your wallet. Select the account where you want to add the network and click [Next].
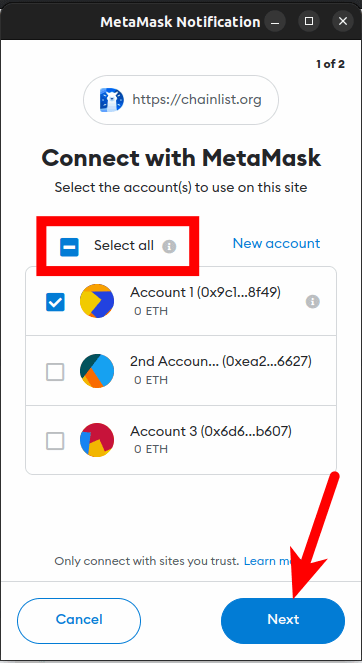
If you want to connect ChainList to all your Metamask accounts, click [Select All] before going over to the next page. We generally do not recommend doing this.
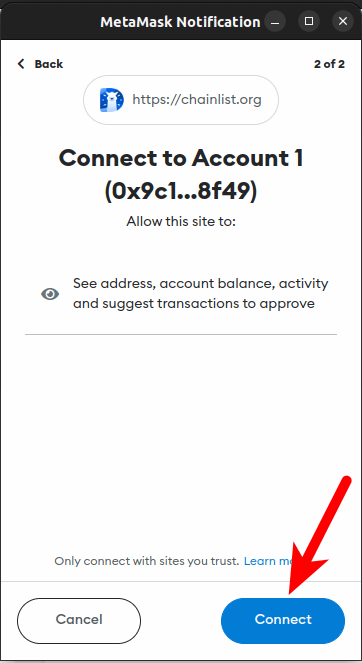
Next, click [Connect] to approve the connection of ChainList to your Metamask wallet.
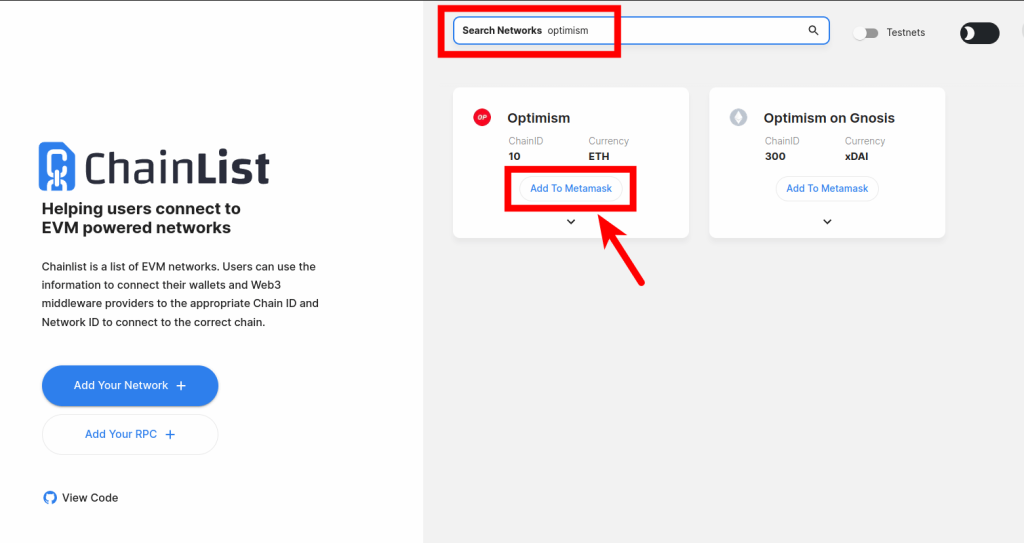
Step 3: Search for the network to be added to your Metamask wallet and click [Add Network].
Go back to the ChainList website and enter the name of the network you want to add in the search box, then click the [Add Network] button under the correct option as shown in the screenshot below.
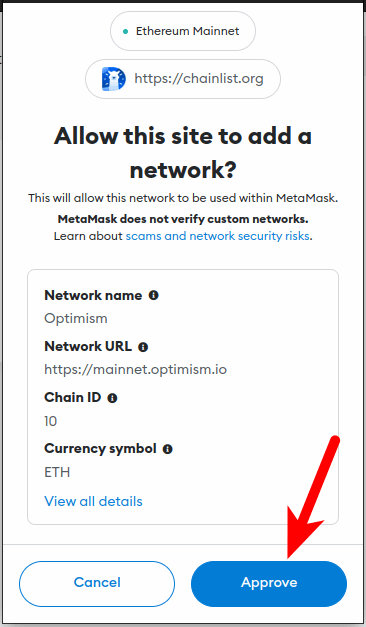
Step 4: Approve the action on the Metamask window.
After clicking the button, you should see another Metamask window asking you to approve the action on your wallet. Hit [Approve] to add the network to your Metamask wallet.
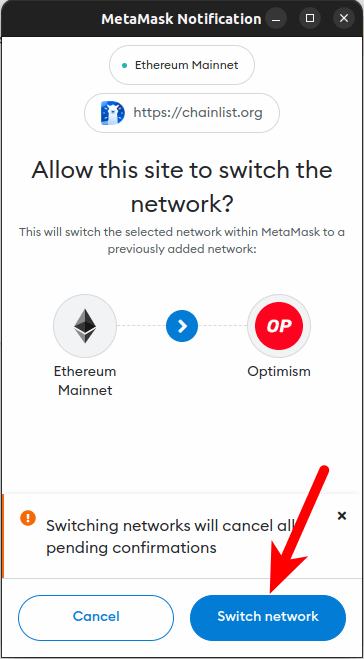
Step 5: Switch networks.
Finally, click [Switch Network] to allow ChainList to switch Metamask networks from the selected network on your wallet to the network you just added to your wallet.
And that’s it. With this, you have successfully added a network to your Metamask wallet automatically using ChainList.
Automatically adding a network to your Metamask wallet with the click of a button is best for beginners who might get confused while attempting to add a network manually using the RPC details of the network.
ChainList will automatically add any network you choose to your wallet with the best available RPC details of the network.
If you want to add a network to your wallet on the Metamask app automatically using ChainList, open the in-app browser on the Metamask app and go to the ChainList website.
Connect your wallet to the website, approve the connection, search for the network you want to add then click [Add Network] and approve the network addition request to add the network to your wallet.
Conclusion
ChainList is an easier way to add any network to your Metamask wallet without fiddling around with the RPC details of the network you want to add. This is an ideal method we recommend to new Metamask users when trying to add a network to their Metamask wallet(s).
To add a network to Metamask automatically, open the ChainList website and connect your wallet to the platform then approve the connection on Metamask. After that, search for the network to be added then add the network to your wallet by clicking Add To Metamask.
And that will be it for this guide. We hope this helped you learn how to use the ChainList website for adding any network to your Metamask wallet automatically.
