
Metamask is the leading decentralized non-custodial crypto wallet out there and the top choice of many new and experienced investors alike in the crypto space.
One of the many advantages of Metamask over many other crypto wallets out there is the ability to add EVM-compatible networks and tokens on these networks to your wallet.
If you have added a network to your Metamask wallet in the past and you’re looking to remove this network (or a bunch of other networks) from your wallet but don’t know how to get started, then you’re on the right page.
In this article, we will be showing you how to remove a network from Metamask in a few easy steps. You will also learn how to remove networks on the Metamask mobile app as well as how to also remove test networks (testnets) that come pre-configured on your wallet.
How To Delete A Network On Metamask
- Open Metamask and unlock your wallet.
- Click the network selection box.
- Click on the “X” sign next to the network to be deleted.
- Select [Delete] on the confirmation dialog.
How To Remove A Network From Metamask (Guide With Pictures)
If you don’t intend to use a network that was added to your Metamask wallet any longer, you can simply remove the network from your wallet.
While deleting a network from your wallet will not delete your tokens on that network, we advise you to transfer or swap the tokens on the network you intend to delete before actually deleting the network.
To delete a network from your Metamask wallet, launch the Metamask extension and click on the network selection box. Now, scroll down and click on the “X” sign next to the network you want to delete to remove it from your wallet.
Below is a step-by-step guide with detailed screenshots showing how you can remove a network from your Metamask wallet.
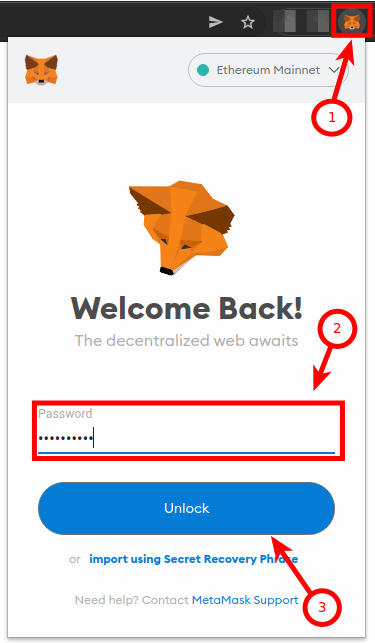
Step 1: Launch the Metamask extension and unlock your wallet.
Before you can do anything on Metamask, you first need to launch the extension on your browser.
To do this, click on the Metamask logo in the extensions area of your browser then enter your account password and click [Unlock] to unlock your wallet.
We are assuming that you’re already a Metamask user but if you haven’t set up Metamask on your device, you can visit the Metamask download page and install the correct version of Metamask depending on your web browser of choice.
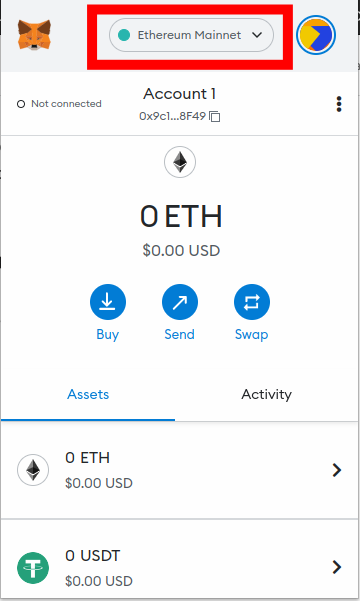
Step 2: Click on the network selection box on the Metamask home screen.
After unlocking your wallet, you should see the Metamask home screen with your available balances.
Now click on the network selection box at the top center of the page to view the list of available (configured) networks on your Metamask wallet.
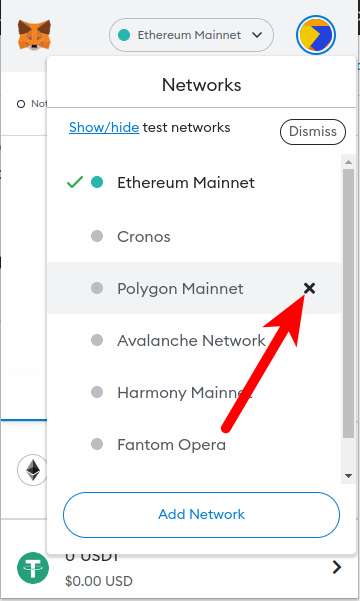
Step 3: Click on the “X” sign next to the network to be deleted.
Scroll down the list of available networks outlined on the popup menu until you find the network you want to remove.
Click on the “X” sign next to the network to remove it from your wallet.
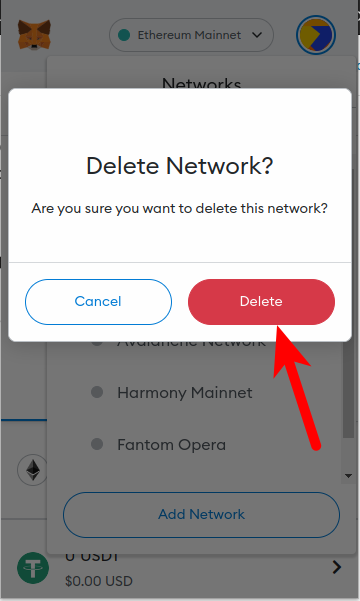
Step 4: Hit [Delete] on the confirmation dialog.
Metamask will ask if you’re sure you want to delete the selected network. Click [Delete] to remove the network from your wallet.
And that’s it, you have successfully removed/deleted a network from your Metamask wallet. You can repeat this step for as many networks as you wish to delete from your wallet.
How To Remove A Metamask Network On Mobile (Android & iPhone)
If you use Metamask exclusively on your mobile device via the Metamask mobile app, then the process of removing a network from your wallet is quite different when compared to the process of completing the same action on the Metamask extension.
Below is how you can remove a network on the Metamask mobile app for Android or iOS devices.
Step 1: Open the Metamask app and unlock your wallet.
Open the Metamask app on your device by tapping on the Metamask icon on your device. Enter your account password and hit [Unlock] to unlock your wallet.
If you have enabled Biometrics on the Metamask app, you should be able to unlock your wallet using any of the available biometric options on your device – FaceID, Fingerprint, or Face Unlock – without having to type in your account password.
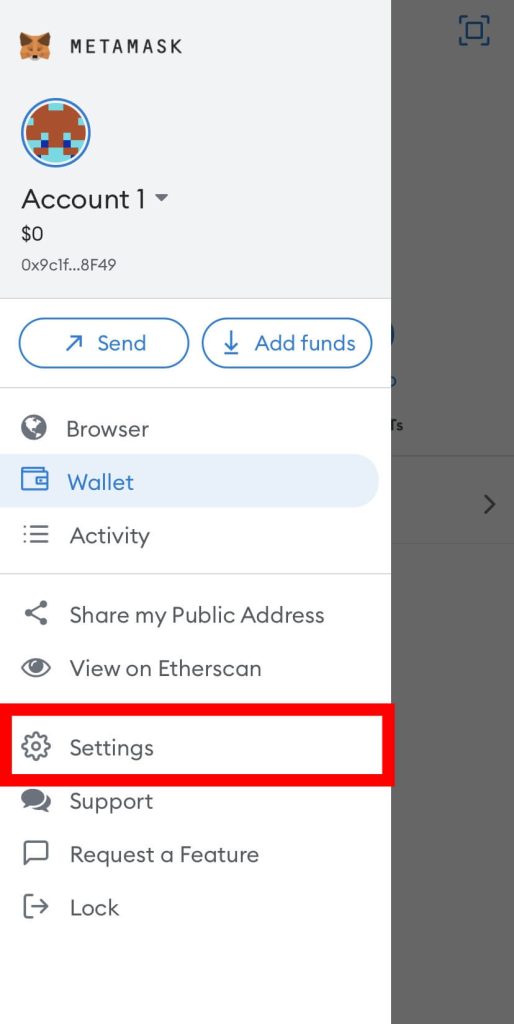
On the Metamask app home screen, tap the Menu icon to extend the Metamask menu as shown in the screenshot below.
Next, select [Settings] from the menu items to open the Metamask Settings page.
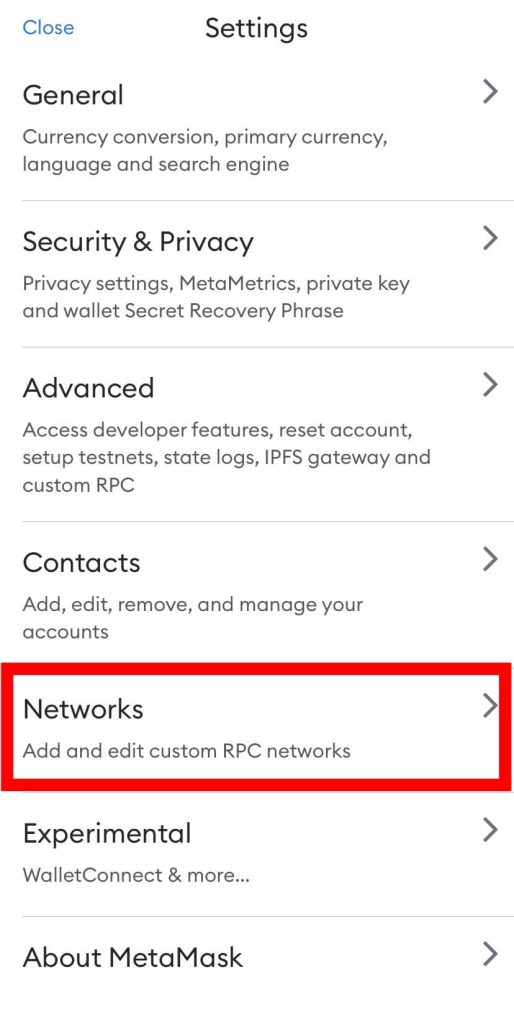
Step 4: Tap [Networks].
On the Metamask Settings, tap [Networks] to view a list of available networks on your Metamask wallet.
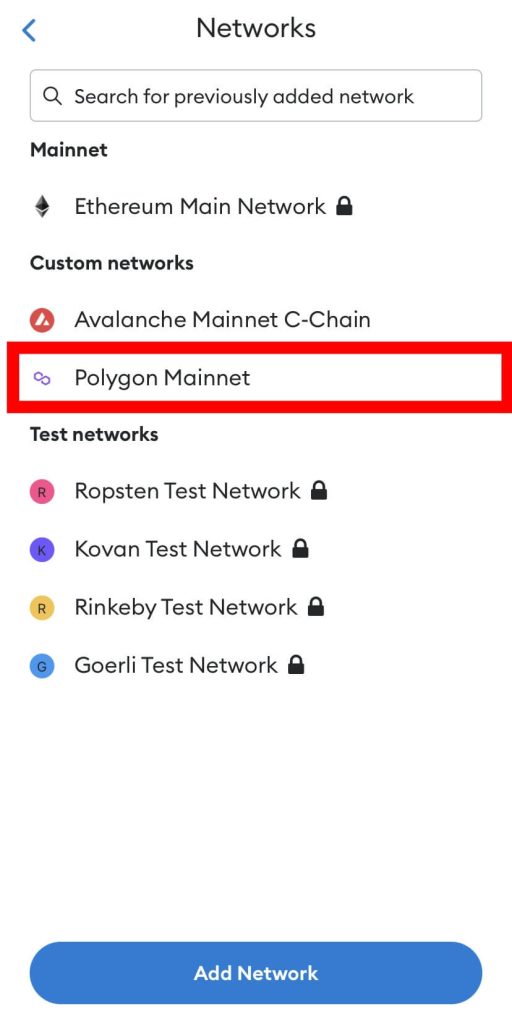
Step 5: Select the network you want to delete.
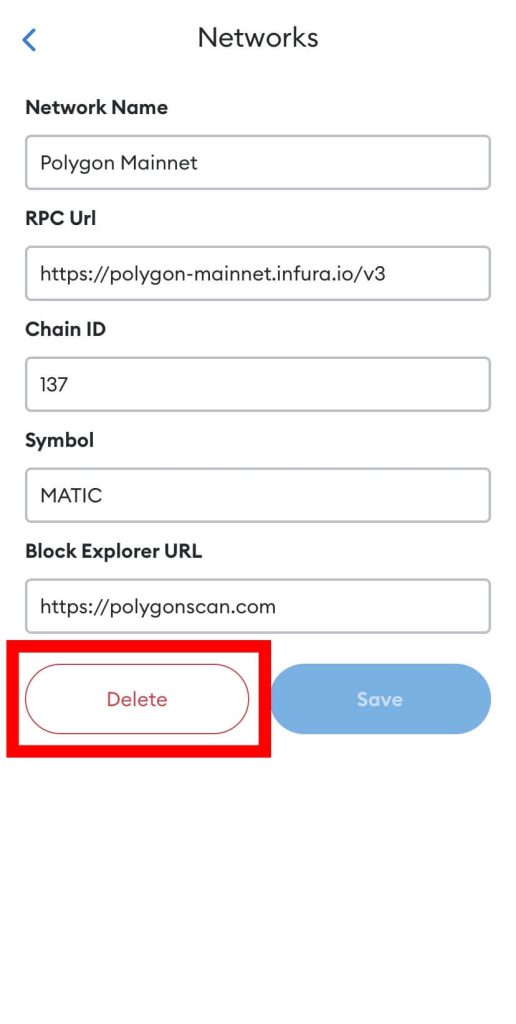
Now, select the network you want to delete in the “Custom networks” section.
Step 6: Tap [Delete] to remove the network.
Finally, hit the [Delete] button to remove the network from your wallet on the Metamask mobile app.
With this, you have successfully removed a network from your Metamask wallet on mobile.
How To Remove A Testnet From Metamask
There are a handful of test networks included on every Metamask installation and these networks like the Rinkeby Test Network, Goerli Test Network and more are alternative blockchains used by blockchain devs to test features before deploying to the mainnet.
If you’re not a blockchain developer, then testnets are useless and you can remove these networks from your wallet if you don’t want to see them any longer on the list of available networks on your wallet.
Here is how to remove all the testnets from your Metamask wallet.
Step 1: Click on your account icon and select [Settings].
On the home screen of the Metamask extension, click on your account icon and select [Settings] from the menu options to open the Metamask settings page.
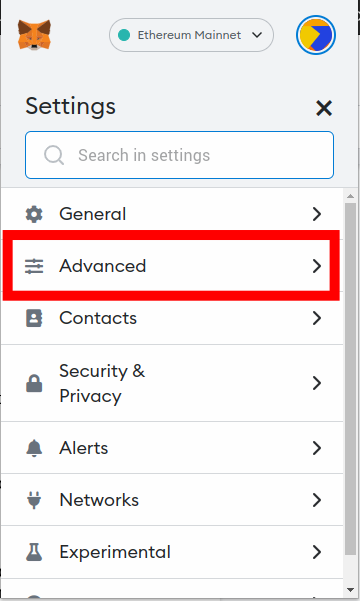
Step 2: Select [Advanced].
Next, select [Advanced] on the Metamask settings page.
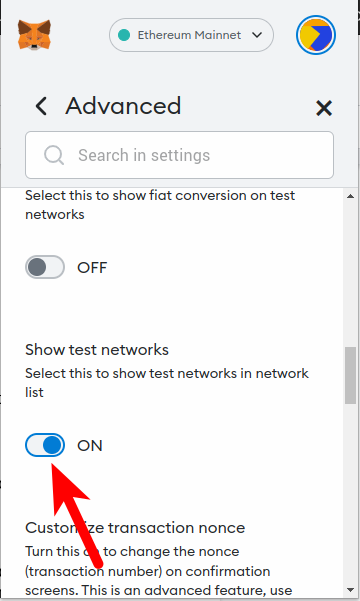
Step 3: Toggle “show test networks” OFF.
Scroll down to the “Show test networks” section and toggle the switch OFF to hide all the Test Networks (TestNets) from the list of available networks on your wallet.
With this, you have successfully removed all the test networks from your Metamask wallet. You can always relist these networks by repeating the process but toggling the switch ON for the last step.
You currently cannot remove test networks from the Metamask mobile app and this guide will be updated when the feature is available.
Wrapping Up
Since you can manually add networks on both the Metamask extension and the mobile app, you can also remove them easily.
To remove a network from the Metamask extension, click on the network selector box to show a list of all available networks on your wallet. After that simply click on the “X” icon next to any network to remove the network from your wallet.
On the Metamask mobile app, things are quite different. First, navigate to the Settings page on the Metamask app and select Networks then select any network and hit Delete to remove the network from your wallet.
For Test Networks, you cannot remove them completely from your wallet, you can only hide them on the Metamask extension. You cannot hide or remove testnets on the Metamask mobile app.
Well, that’s will be a wrap on this guide about removing a network from Metamask. We hope you found this guide helpful if you were searching for a way to remove a Metamask network from your wallet.
